Showing posts with label Chinese Buns 包点 馒头. Show all posts

10 August 2017

Green Tea Spiral Mantou (Chinese Green Tea Steamed Bun 緑茶双色馒头卷 ) (Overnight Sponge Dough Method)


Mantou (Chinese Steamed Bun) is a simple versatile bun, you can add varieties of flavour to the bun to suit your family taste buds. This is my second spiral mantou, you may like to look into my previous Chocolate Spiral Steamed Bun if you prefer the chocolate flavour. 

Matcha green tea flavour mantou is very refreshing, just keep the green tea powder to a teaspoon, the distinctive bitterness of the green tea will not overpowered the plain milk bun portion. To get the beautiful green tea spiral the proportion of green tea dough and plain dough for this creation is 1:3.


Ingredients: 
Overnight Sponge Dough:
60 g low gluten flour (中劲面粉)
40 ml water
1/2 tsp instant dry yeast

1 tsp sugar

Mantou Dough:
all of overnight sponge dough, tear into small pieces
350 g low gluten flour

1/2 tsp instant dry yeast
200 ml warm milk 
30g fine sugar
1/4 tsp salt
1 tsp green tea power + 1.5 tbsp water (for green dough)


Method:
Prepare the overnight sponge dough: 
1. Place all dry ingredients in a bowl, pour in water, stir well to combine. Mix well.
2. Place the mixture in a plastic cling, tighten the dough. Place the dough in the fridge proof overnight.

3. Take out the dough 30 mins before using. 

Prepare the mantou dough:
1. Place all dry ingredients in a big mixing bowl, gradually add in 200 ml warm milk. Knead the dough together to form rough dough. Take out 1/3 of the dough and mix with the green tea-water paste. knead well. 
2. Knead the 2/3 milk dough to smooth dough (add more milk if the dough is dry). Cover and let it proof to double in size.
3. Knead the 1/3 green tea dough to smooth dough (add more milk if the dough is dry, add a bit of flour if it is too sticky). Cover and let it proof to double in size.
4. Punch down the air in the milk dough and flatten it to rectangle thin dough. Do the same for the green tea dough. Flatten the green tea dough to the same rectangle size as the plain dough. 
5. Overlap the green tea dough on top of the milk dough as in the photo. Roll the dough up gently. Cut the dough into 2 inch section, place a piece of parchment paper below each dough. (note: At this stage, I actually cut the dough into two portions before I roll up the dough, I flipped one dough into opposite colour with the other portion so to get green dough at the outer design)
6. The steamer has to be preheated to around 35C, switch off the fire. Place the mantou dough inside the steamer and proof for 15 mins or until it is double it size. 
7. Switch on the fire to medium and steam for 15 mins. Leave a gap on the steamer when it is nearly done, you have to place a chopstick between the lid and the steamer.
8. Switch off the fire immediately when the steaming time is 15 mins. Let the mantou sit off heat in the steamer for 5 mins before take them out. 

28 July 2017

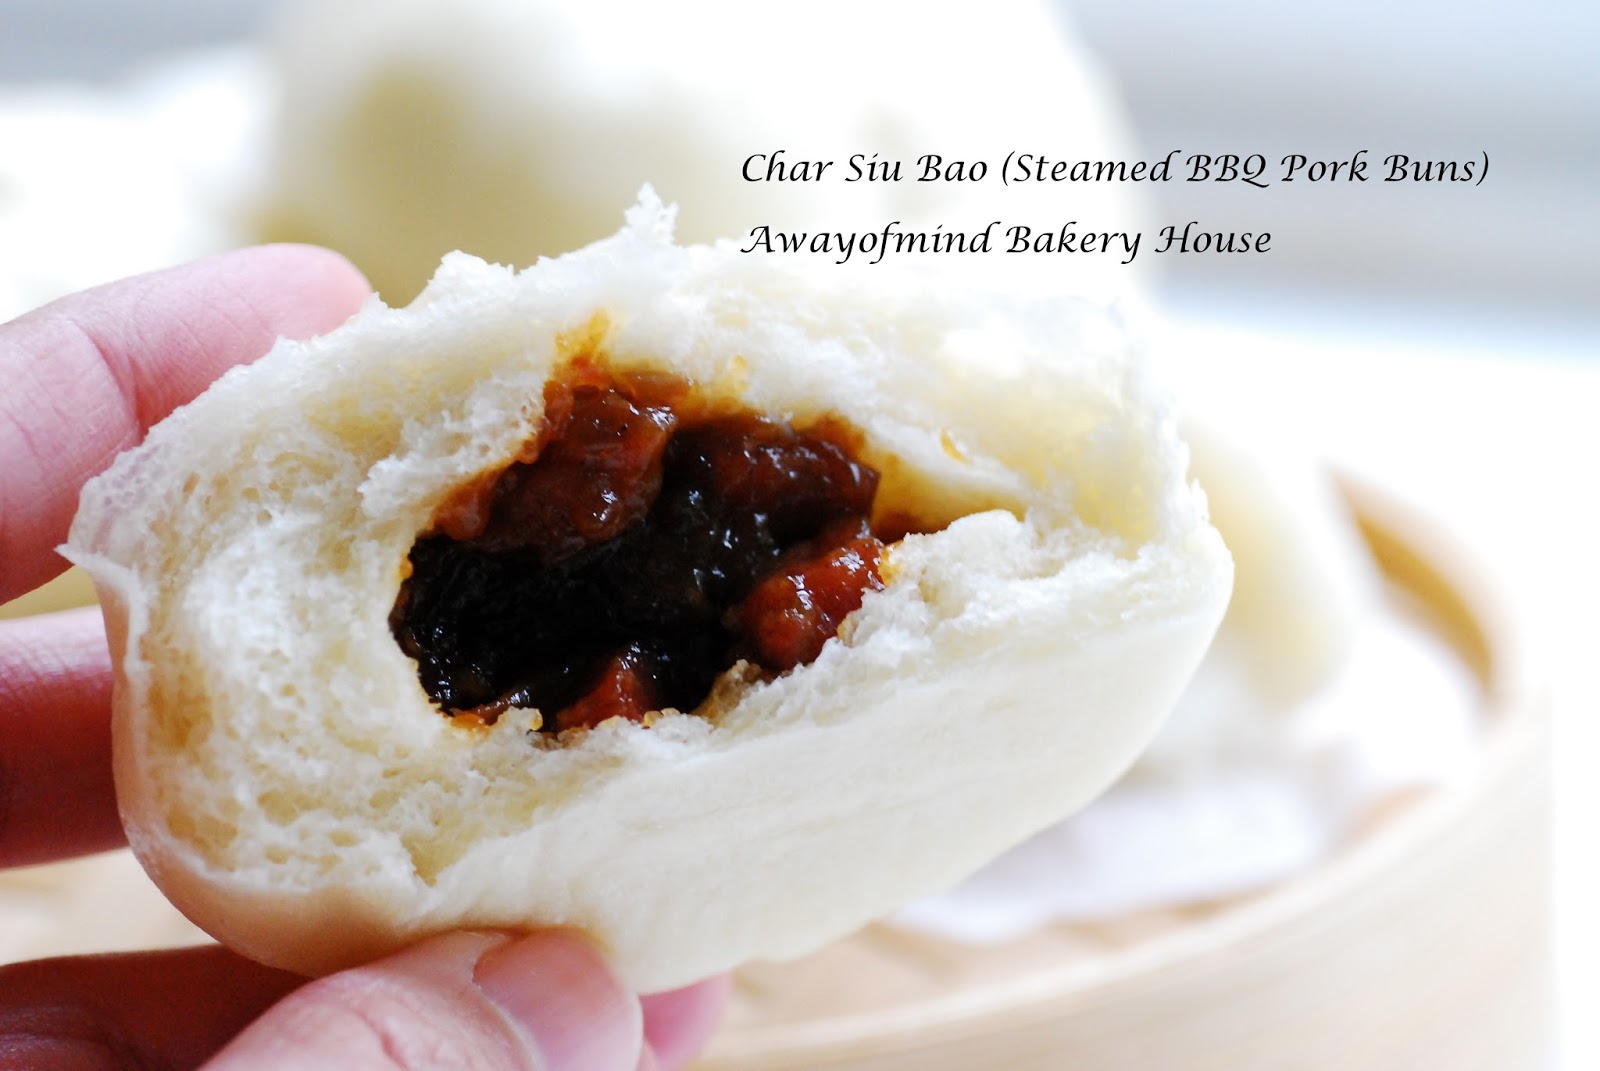
Char Siu Bao (Steamed BBQ Pork Buns) 叉烧包


Char Siu Bao is the Chinese Steamed BBQ Pork Buns which you can easily find at any Chinese Restaurant especially the one selling Dim Sum or Yum Cha. The size of the Char Siu Bao can be varies, some restaurants make the Char Siu Bao in dedicate bite size, however, some prefer it to be half our palm size. To me, I love Char Siu Baos because of its filling, the sweet, sticky with a faint fragrance of oyster sauce, the taste just make you want to continue eat more of it. 

I can't find Hong Kong flour over here and I'm using Lighthouse self-raising flour for steamed buns. The baos came out a bit yellowish and not totally white in colour like the one selling. To cut short the cooking time, I bought the real deal tender and juicy Char Siu instead of homemade. 

This recipe yield 21 buns. (I have extra filling for another bread making)


Ingredients:
BBQ pork filling (The filling is able to make 40 buns):
500 g diced Char Siu (BBQ Pork)
1 small brown onion, diced
1 tablespoon sesame oil
2 tablespoons sugar
3 tablespoons Chinese cooking wine
4 tablespoons oyster sauce
2 tablespoons dark soy sauce
3 tablespoon tapioca flour
1 tablespoon light soy sauce 
1/2 tablespoon cooking oil
500 ml water

Bao Dough:
400 g self-raising flour for steamed bun
8 g instant yeast
160 ml warm water
30 g vegetable oil
60 g sugar
10 ml cold water
2 teaspoons baking powder

Method:
Prepare the BBQ filling:

1. Heat up a cooking pan with cooking oil, add diced onion. Stir fried the onion until it is soft. Add the diced char siu, pour in the water. Add sesame oil, sugar, oyster sauce, light soy sauce and dark soy sauce. When the water is boiling, turn the heat to medium, add the Chinese cooking wine, let it continue simmer for a while. Taste the char siu, if you prefer it to be sweeter, add more sugar. (The Char Siu filling should be strong in flavour so it can fusion well with the plain bao texture) 
2. In a small bowl, add tapioca flour and mix well with 2~3 tablespoons of water, mix well. Pour the tapioca mixture into the cooking pan. Let the Char Siu gravy thicken. Remove the pan from the heat. Set aside to cool before store in the fridge for at least 2 hours (I let the filling sit overnight in fridge)

Prepare the bao dough:
1. In the mixing bowl, add self raising flour, instant yeast, warm water, and sugar. Using KitchenAid, speed 1 mix the flour mixture together to form rough dough. Add in vegetable oil, continue to knead in speed 2 until the dough is smooth.
2. Cover the dough and let it proof until double its size.
3. In a small bowl, add baking powder and the cold water. Mix well. Set aside.
4. When the bao dough is ready, punch down the air. Mix the dough with baking powder mixture, knead well. Let it rest for 15 mins.
5. Divide the dough into the desire portion, for my case 21 portions. Shape the dough into round balls, rest for 10 mins.
6. Flatten the dough, wrap in a heap teaspoon of filling, wrap up and seal the dough. Place a piece of baking paper below each bao dough.
7. Arrange the bao dough in a pre-heat off heat bamboo steamer (or any type of steamer you have). Let it proof for 15 mins. 
8. Switch on the heat, steam the bao for 10 mins. Off the heat, let the bao sit inside the off heat steamer for 5 mins before taking them out. Serve warm. 

03 June 2016

Pan-Fried Buns with Chives and Pork Filling 韭菜猪肉馅饼


It has been a while since I last make a Chinese bun. This afternoon I made 24 pieces of pan-fried buns with chives and pork filling. This is a delicious juicy meat bun with crispy outer layer. Today the filling is very special because I added about 200g of my leftover roasted pork belly in it too! My family love to eat this pan-fried bun with Chinese black vinegar and "Loaganma" brand chili.

The bun dough is without yeast in it, it is consider easy to make. 


After pleating, use the palm to press on the bun to flatten it


Referring to Carol's recipe with modification on the filling
Ingredients for dough (24 pieces): 
500g all purpose flour
40g vegetable oil
1/2 tsp salt
200ml hot boiling water
50ml cold water (gradually add in, add more if the dough is too dry)

Ingredients for filling:
200g roasted pork belly, chopped into small 
200g minced pork
a bunch of spring onion, chopped into small rings
1 tbsp minced ginger
a bunch of chives, chopped into small 
1 egg

Seasoning: 
100ml shao xing jui (Chinese rice wine)
50ml cold water
1 tbsp sesame oil
1/2 tsp salt
1.5 tsp of corn flour
a few days of ground black peppers 
2 tbsp oyster sauce


Method:
1. Prepare filling: In a big bowl, place the minced pork, minced ginger, egg and all seasoning in it. Use a pair of chopstick to stir the meat mixture in one direction until all liquid is absorbed by the meat and the meat turn a bit gooey. Add the chopped roast pork belly, chopped spring onion and chives in it, mix well. Keep in the fridge for later use. 

2. Prepare the dough: In a mixing bowl, place the flour, vegetable oil, salt, and pour in the hot boiling water, using electric mixer, mix in low speed, gradually add the cold water. (on and off use the hand to feel the dough texture, if the dough is dry, add a bit more cold water) When the dough come together and form a soft rough dough, stop the electric mixer. 

Take the dough out and place on a clean worktop, knead the dough with hands until the dough is smooth. Place the dough in a lightly grease container and let it rest for an hour. 

After resting the dough, take the dough out and knead it into a long log, divide into 24 small dough balls. Take a small dough ball, flatten it with rolling pin and place a tablespoon of filling in the middle. Pleat and seal the bun. Use the palm to flatten the bun a bit. Doing the same for remaining dough.

3. Cooking the bun: Heat up a flat pan with 3 tablespoon cooking oil, place and arrange the bun neatly in the flat pan, lower the heat to medium-low, pan fried the buns until golden brown on both side. Serve warm. 


13 July 2015

Sheng Jian Bao / Shui Jian Bao (Pan-Fried Pork Bun 生煎包/ 水煎包)


一转眼又到了七月,这一个夏季是有那么多的期待!
希望脚下可以踩着碧绿的大地,蔚蓝的天空是会下大雨的。
眼帘可以看见除了沙尘还有别的颜色的城墙。
厨房的库子不需因担心买不到现货而顿满几年都吃不完的干粮。
这个沙漠除了风和沙,还有很多美好的短暂友谊。
每个人,都是离乡背井来到沙城,朋友是热情的,但 每一个朋友都会有离开这里的一天。

今天倒数计时开始,把开袋的剩余面粉弄成水煎包(生煎包),我家孩子爱吃的!!食谱是和以前的相像。好怀恋“上海1930”餐馆!这一次共搓弄了35粒水煎包, 那鬆软的肉包和脆皮焦底是好吃呐!! 

Making the Shui Jian Bao / Sheng Jian Bao or Pan Fried Pork Bun using the leftover flour, need to clear the pantry before I go on long summer holidays! This Shui Jian Bao is one of my son favourite, if you give him between spring roll and one of this Shui Jian Bao/ Sheng Jian Bao, for sure he will choose the bao! My first encountered with this crispy fried bottom and soft bun was in 2013, the "Shanghai 1930" restaurant make great Shui Jian Bao! 

This round, I made 35 pieces using the same quantities for bao dough but almost double the previous filling recipe. If you are not consume the baos in the same day, keep the extra raw baos in freezer, no need to thaw the bao when cooking, just place the frozen bao straight to the pan, add oil, 1/3 water of the height of bao, cook with medium fire.

Happy summer holidays and see you in late August! 


Ingredients for filling:
800g minced pork
2 egg
3 tbsp tapioca flour
150g chives, chopped
3 tbsp mirin
3 tbsp oyster sauce
1 tsp salt
3 tbsp sugar
200ml water
5 tbsp homemade rice wine

a dash of black pepper

Method:
Mix all ingredients together in a bowl, stir in one direction until all liquid absorb by the meat. Place in fridge for later use.

Yield:35 pieces big baosIngredients for Bao dough:
800g mantou flour (or all purpose flour)
600ml warm water (gradually add in)
90g sugar
5g instant dry yeast
2 tbsp cooking oil

some sesame seeds
some water for cooking

Method:
1. In a big mixing bowl, add the flour, sugar and dry yeast. Gradually add in water. Use a pair of chopstick to stir the mixture together. Then knead it into smooth dough. Let it rest for 10 mins.
2. Divide the dough into 35 pieces (can divide more), flatten the dough with your palm and press the edge of the dough thinner than the middle part. Stuff in filling. Pleat the dough together and seal it on the top. (can sprinkle sesame seeds on top)
3. Prepare a flat bottom pan, pour in 2 tbsp cooking oil, arrange the bao doughs into the pan, switch on the heat to medium, pour in some warm water (about 1/3 of the bao height) and cover the lid. Let the water boil and dry in the pan (about 10~15 mins). When your hear drizzling sound, is time to open the cover.  The water should dry out and the bottom of the bao should be golden brown. 
4. Transfer the bao to a serving plate, sprinkle with some sesame seeds. 

Note: Should not heat up the pan with oil in it before you arrange the bao as it will char the bottom of the bao before you manage to pour water in it. 

08 February 2015

Mantou (Chocolate Spiral Steamed Bun 鲜奶巧克力双色馒头卷)


Mantou (Chinese Steamed Bun) a simple bun that can be taken plain or even go with chili crab, braised pork, curry, etc. In some occasions, we eat deep fried mantou. It is with no filling but mantou can have many varieties of flavour depends on what you like. I used to make bao, a type of Chinese steamed bun with filling, to me there is a little difference between these two steamed buns. The texture of the mantou is not so fluffy as the bao. Mantou texture is soft but denser than bao! My son ate two of the chocolate spiral steamed buns straight after I took the photos!

The proportion of chocolate dough and plain dough for this creation is 1:3, I have tried on 1:1 but the swirl turned out is not what I like. I love how this swirls turned out, it looks beautiful! 

This recipe is with reference to Carol's Milk Mantou (鲜奶馒头) with minor change. I add a tsp of cocoa powder and extra 30ml of milk. 

今天上的馒头。。。自己是非常满意那双色卷。巧克力和白面团的对比是 1:3


02 November 2014

Green Tea Bao and Black Sesame Bao


Learning to pleat the perfect bao, making a lot these few days. Will not share bao recipe until I can get the pretty pleat I want. Most of the time, the bao pleats all gone after steaming. Anyone can share how to resolve this issue? Is the dough recipe? Is the proofing too long? 

Love the green tea bao!!!


03 October 2014

Steamed Pumpkin Buns aka Pumpkin Bao with chicken filling


好久没弄包子了,前几天看到好漂亮的Butternut 就搬了好几粒回家。这个月是Eileen的 Little Thumbs Up:pumpkin! 我也来参加骤热闹!

It has been long since my last making of bao (steamed bun), this month I have a good reason to make steamed pumpkin bun or bao because of Eileen's Little Thumbs Up is pumpkin theme! I made two batches yesterday, in the first batch of my pumpkin baos, I pleated the baos, the bao turns out with not so obvious pleats and I don't like the look of it. So I made the second batch with round shape. :) The dough of the pumpkin bao is a bit wet with starter dough in it, but the bao texture turned out with very soft texture! 


Recipe adapted from Honey Bees Sweets with changes
Ingredients for filling:
3oog chicken, chopped into fine cubes
6 shallots, sliced thinly 
120ml water
4 tbsp char siew sauce 
1 tbsp tapioca flour
1 tbsp corn flour
1 tsp plain flour
1 tsp dark soy sauce
2 tbsp cooking oil

Method:
1. In a big mixing bowl, add all ingredients together (except shallot), mix well.
2. Heat up cooking oil in a frying pan, add sliced shallot, fried until slightly brown. Add in (1).
3. Stir Fried until the chicken is cooked and the gravy thicken. Set a side for later use.

Ingredients for bao/ bun:
starter dough:
120g plain flour
1/4 tsp dried instant yeast
80ml water
pinch of salt

Method:
Mix everything together to form a rough dough. Cover and let it rest in a greased bowl to proof into double in size.

Main dough:
180g pumpkin, steamed and mashed
100g starter dough
300g cake flour / top flour
1/2 tsp dried instant yeast
20g milk powder
20g sugar
20g olive oil
1/8 tsp salt
50ml water (this depends on how wet the mashed pumpkin is, you may need to add more or reduce water)

Method:
1. Knead everything in a mixer (except water and oil, add gradually), until it is not sticky and form a rough dough, add oil and continue knead until it form elastic film.
2. Cover the dough and let it proof to double it size.
3. Prepare steamer and cut out grease paper.
4. Punch out the air in the dough, cut the dough into desire portions (~12 portions), roll the dough into round, cover and let it proof for 10~15 mins.
5. Take a dough, flatten it into round disk, place a small heap teaspoon of filling in the center and then wrap up the dough with seal side down on the grease paper.
6. When the steamer is boiling, lower the heat to medium and arrange the bao in the steamer and steam for 10~12 mins. Make sure the cover of the steamer is wrapped with kitchen towel to prevent water from dripping on the baos.
7. Once done, lift the cover to open a small gap, let the baos sit in the steamer for another 5 mins before take them out for serving. 


This post is linked to the event Little Thumbs Up (Oct 2014 Event: PUMPKIN) organised by Zoe (Bake for Happy Kids) and Mui Mui (My Little Favourite DIY) and hosted by Eileen (Eileen's Diary).


Also submitting this post to "My Treasured Recipes #3 - Taste of Autumn (Oct/Nov 2014)" hosted by Miss B of Everybody Eats Well in Flanders and co-hosted by Charmaine of Mimi Bakery House. 

23 November 2013

Shui Jian Bao / Sheng Jian Bao (Pan-Fried Pork Bun 水煎包 / 生煎包)


今天突然想吃水煎包(生煎包),那是在"上海1930"餐馆吃过的,好怀恋哟!想想就来玩手工搓面团练练膀力,也好消掉那余下的馒头粉吧 !

Today I have make Shui Jian Bao or Sheng Jian Bao (pan-fried Pork bun), a crispy fried bottom and soft airy top bun. Missed the one at "Shanghai 1930" Restaurant. As I have keep my KitchenAid in box, this is a good chance to make hand knead bun again...after so long ^_* I know tonight I will have to rest my arms straight on bed. 

19 October 2013

Steamed Custard Bun (Nai Huang Bao) 惜福奶黄包


嗨,我回来了!
这一个月的离开给了自己和家人更多的时间去思考好多应该处理的事,心定了,是时候行动了。希望这几天还有心情弄菜烘焙,下来的几个月,我会很忙,是没空上料理和上网络了,请多包涵。原本想写英文的,因为我用拼音得用好多时间,但已立志要自己教儿子学华文,我也得多加强才好。

关于我家的包子,我想你也看厌叻,是想分享那新买的“福”印章。这“福”印章是我在Richmond的越南杂货店无意看见的,好几个印章就散放银台前,一个是好贵的奥币14!想了好久才买下的,我以后也不知还有没机会买到这种中文印章,必竟中东还没有奥大利来得方便。

原来呀,把那印章盖上柔软包子回弹的那一刻才是喜悦的颠风!好喜欢那福字,是惜缘,是惜福。

我们都不应把希望交给过去或未来。。。因为只有现在这一刻是应该把握的,加油!

27 May 2013

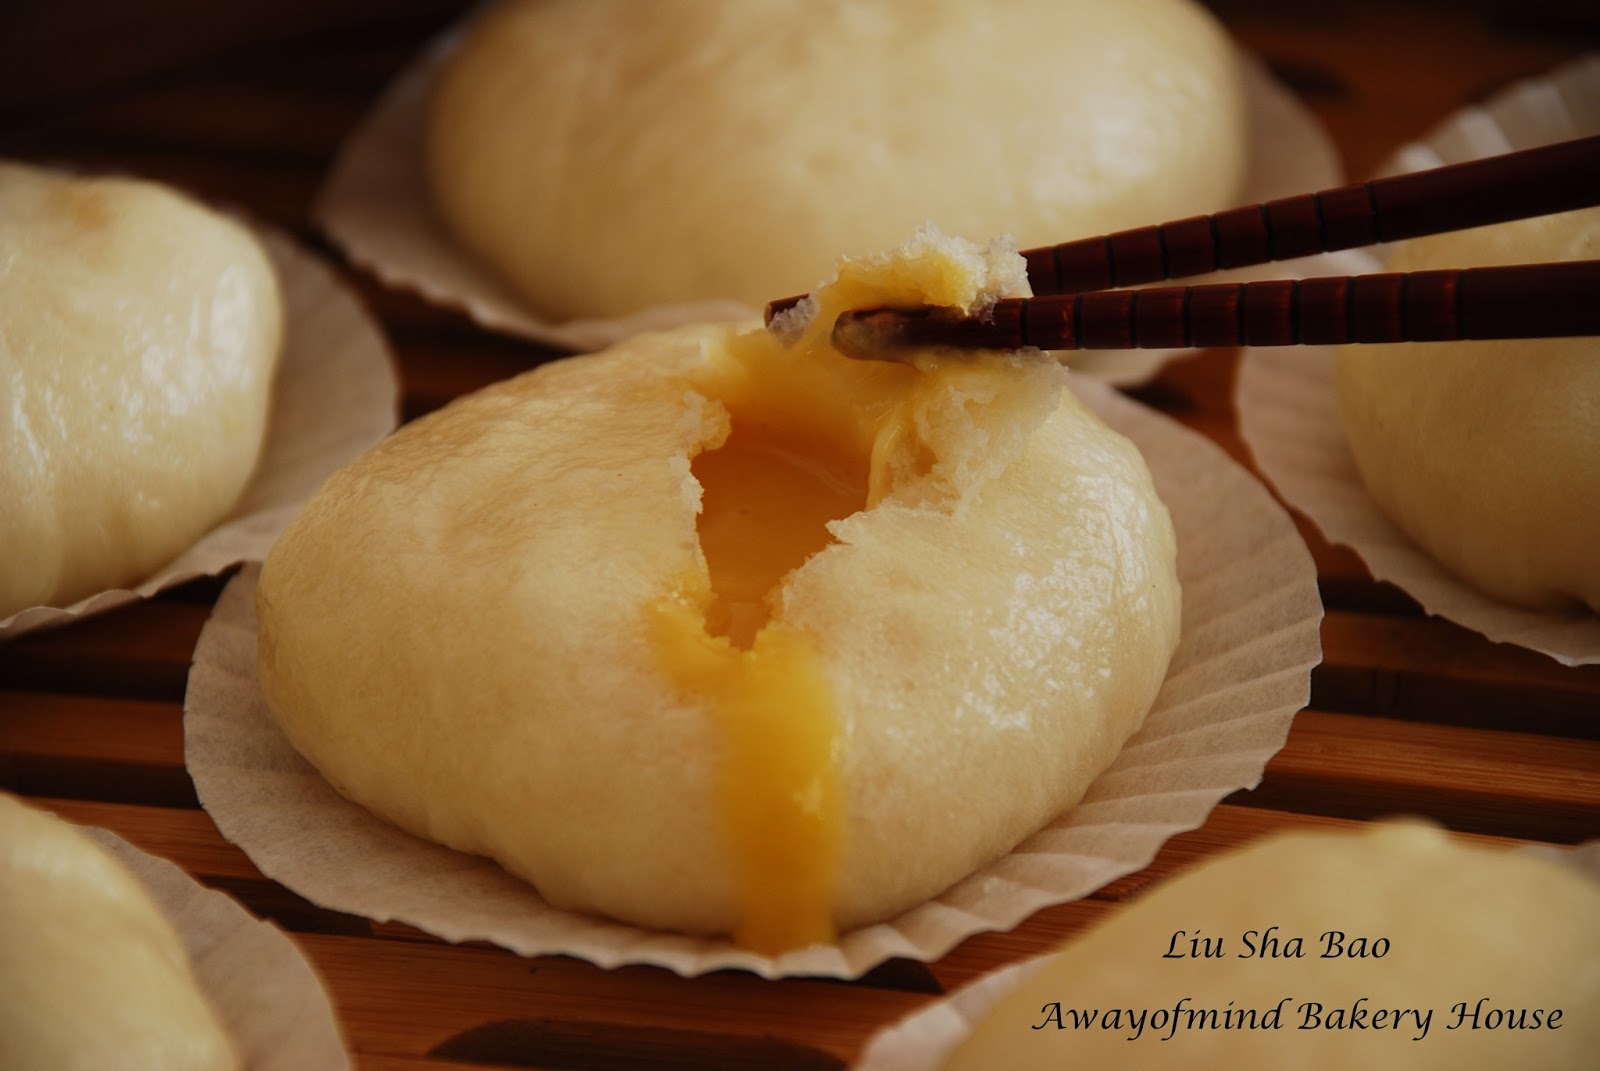
Liu Sha Bao 流沙包 (Custard Bun)


I have tried making this Liu Sha Bao since last week and sadly to say I can't get the perfect bun texture for the Liu Sha Bao. I had changed to use the 水仙牌bao flour (there is limited brand available over here) How I wish I can get the Hong Kong Bao Flour here!

The challenge I faced on making the Liu Sha Bao are:
1. The liquid type of filling, which need to be frozen first.
2. Texture of the bun can't turn fluffy as I wish due to the liquid custard in it.
3. Shorter steaming time as not to burst the custard filling.

Anyway, there is still room to improve for the taste of this liquid type custard filling. If you got a good recipe on this Liu Sha Bao, please share with me, I would like to try :)

Recipe for filling and bun is taken from here.


15 May 2013

Steamed Custard Bun (Nai Huang Bao 奶黄包)


I have been busy travelling between my house and my son school lately because I've volunteer some of my time helping up in his school. The school conducted a few days of workshops for parent helper then we are roster to the class on the time slot we have chosen. I also help up in my son PMP (Perceptual Motor Program) class. It is great to know and see for ourselves what our kids are learning and what kind of activities they need to go through for the day. I'm glad that I've choose to assist in his class. 

When I know that this month Aspiring Bakers #31 is Bao Ho-Chiak 包好吃 (May 2013), I'm so happy because it creates a good reason for me to make the yummy custard buns for my son again. Last night when Gabriel saw me making the custard filling, he was so excited and keep asking was that for supper or breakfast? I told him I'm just making the custard filling and it wouldn't be ready for breakfast because I'm so tired, I'll only make the bun tomorrow morning after he goes to school. 

Talking about custard bun, what I know is there are two types, one is the liquid custard filling that we call it Liu Sha Bao 流沙包. Another one is a creamy filling one that we call it Nai Huang Bao 奶黄包. I love both of them. In this bun making, I'm using my previous recipe which I come out with my own quantities after watching an online video 奶黄馅制作过程1-4 (videos by irenechanwai). I'm posting the step by step photos on how I steamed, mashed and kneaded the filling, hope it will help you making the moist and soft custard filling too :) 


Recipe from Ah Tze's kitchen play

Ingredients for custard filling:
150g custard powder
3 tbsp icing sugar
4 tbsp milk powder
150ml coconut milk
50g evaporate milk 
1 egg
2 tbsp melted butter

Method:
1. In a bowl, place custard powder, icing sugar, milk powder together. Add coconut milk, use hand whisk to stir until the sugar dissolved. 
2. Add evaporated milk. Add egg, stir until combine, add melted butter.
3. Sieve the liquid and pour it into a lightly grease pan and steam for 10~15 mins. (depends on your steamer). Photo (1).
4. Take the custard out from steamer and mash the custard with a spoon. photo (2)
5. When it is a bit cooler, knead it using hand until the custard is smooth. photo (3)
6. Divide the custard dough into small balls. photo (4) 
7. If you are not using straight away, you can keep it in the fridge for later use.


Recipe from Ah Tze's Kitchen Play
Ingredients for Bun:
350g +50g bao flour (the 50g is gradually add in when the dough is too wet)
1 tsp or 5g dried instant yeast 
200ml warm water 
30g sugar
1/4 tsp salt
some vegetable shortening 

Method:
1. Add all above dry ingredients into a bowl, gradually pour in the water. Knead the dough to form a non sticky dough, add the vegetable shortening and knead until the dough is smooth and elastic. 
2. Place the dough in a bowl, sprinkle with a bit of water on the dough, cover with a clean damp cloth. Let it proof for 30~45 mins. (If you are in cool weather country like me you can heat up an oven to 50C for 5 mins, then switch off the oven and place the dough in it.)
3. Once proofing complete, punch out the air and form a long dough. Divide the dough into 15 nos. 
5. Flatten the dough with rolling pin, stuff in custard filling in the middle, wrap it into small ball.
6. Place bao dough on a piece of baking paper and let it proof for another 15 mins. (As my place is cold so I let the bao sit in the steamer with heat-off for 10 mins., when you see the bao has expand a bit bigger, then you can switch on the steamer and start the steaming process)
7. Place bao dough in the preheat steamer and steam for 10~12 mins.


I'm submitting this post to Aspiring Bakers #31 is Bao Ho-Chiak 包好吃 (May 2013), hosted by Miss B of Everybody Eats Well in Flanders.

22 November 2011

Steamed Black Sesame Custard Bun (黑芝麻奶黄包 Black Sesame Nai Huang Bao)


My son requested to have Creamy Custard Bao for breakfast yesterday, and I promised him I'll make a nice one for him today. It has been nearly a year since I last made the bun with this custard filling recipe. It is different from Carol's recipe because of the coconut milk added. It has a stronger coconut's aroma and ...involved more work, the custard needs to be steamed, mashed and kneaded. Of course, for my son, the extra work is nothing.

I made the baos with two types of filling, one is with red bean paste (leftover from making mooncakes) and the other one is creamy custard. Added black sesame powder to the bao dough turned the bao into a stunning grey, with the yellow custard filling it looks  beautiful and perfect for my afternoon tea. 

19 October 2011

Steamed Purple Sweet Potato Chocolate Bun/ Bao


Rainny day.
Today is the third day walking Gabriel to school, he was rubbing his eyes, still tired after a short nap. He looked happy, smiling and joking with me while I held his little hand.  This new school is so close to home, a 5 mins walking distance, and I really appreciate God give me this opportunity to walk my son to school, this experience is invaluable. So much joy to see him willing to wear his new uniform and anticipate to see his teachers and friends.

It was raining heavily when I went to fetch him, I cuddled him close to me and he held the umbrella which was so big if compared to his size. The 5 mins walk was so long as my sandle was so slippery and Gabriel was a bit heavy for me. He held the umbrella up right until we reached our condo gate, when I finally placed him on the floor, he asked me "Mama, are you tire?" His caring warm my heart. Sharing an umbrella, snuggle together to prevent getting wet, all these experiences I will treasure in my heart for a long long time.

This afternoon, I made these purple sweet potato chocolate buns using the leftover from my previous baking, need to clear the fridge as I'm counting down for my holiday :) Gabriel loves chocolate, he will be happy to see this bun waiting for him when he is home.

22 September 2011

Chocolate Green Tea Bao/Bun (with red bean)


I have lot of red bean paste leftover from my mooncakes making, what should I do? Lot of ideas cross my mind. To me, Bao/Bun making is easy and fast with less cleaning up, as no machine required. I made these buns in 1.5 hour using Straight Dough Method! (I've  mentioned so many times, still I need to say, I love Gelatinized Dough Method)

Cocoa powder and green tea powder are used to create double tones on the bao skin, but as you can see the green is subdued. May be you can share with me on the type of green tea powder to be used for getting the beautiful green. I'm referring to 爱生活,爱厨房 to make mine baos.

12 September 2011

Steamed Creamy Purple Sweet Potato Custard Bun (紫薯奶黄包)


It has been a while since my last making of bao/ bun. I made these Purple Sweet Potato Custard Buns, WT was around to help me taking care of Gabriel that afternoon. I packed the bao as dinner, we were in a rush to attend the Moon/ Lantern Festival celebration at the Singapore Zoo and we have friends help sampling food too :) Actually it is my first time asking friends to sample my bao.

It was in a hurry to make these buns, I used the straight dough method instead of the usual gelatinized dough method which I preferred. The texture of the bun is still soft when I consumed it the second day, it could be because of purple sweet potatoes added.  

05 April 2011

Jicama Bun 沙葛包 (Bang Kuan Bao)


Recently quite lazy in update my posting, just concentrate doing my kitchen play. WT are back from overseas posting, I no longer able to sit in front of my computer for the whole night... I think he should be happy to see this remark. 

Let me present to you my successful Jicama Bun. Jicama or Pachyrhizus erosus or commonly referred to as "yam bean" or well known as "Bang Kuan" to the ethnic Chinese in Southeast Asia is a kind of crispy , sweet, edible root. It should be peeled to reveal the white inside.  It is excellent raw for salads, but I prefer it to be cooked. Usually in Asia, we used it in "popiah" or spring roll.

The making of this bao is inspired by Vivian from Vivian Pang Kitchen after seeing her using Sponge Dough Method for the bao. This is my first time trying out Sponge Dough Method and yes, I love the result! I'm using Vivian's bao recipe and steps for the bao and as for the filling is from Ah Tze's kitchen play :)