Showing posts with label Biscuits / Cookies / Shortbread. Show all posts
18 January 2019
06 February 2018
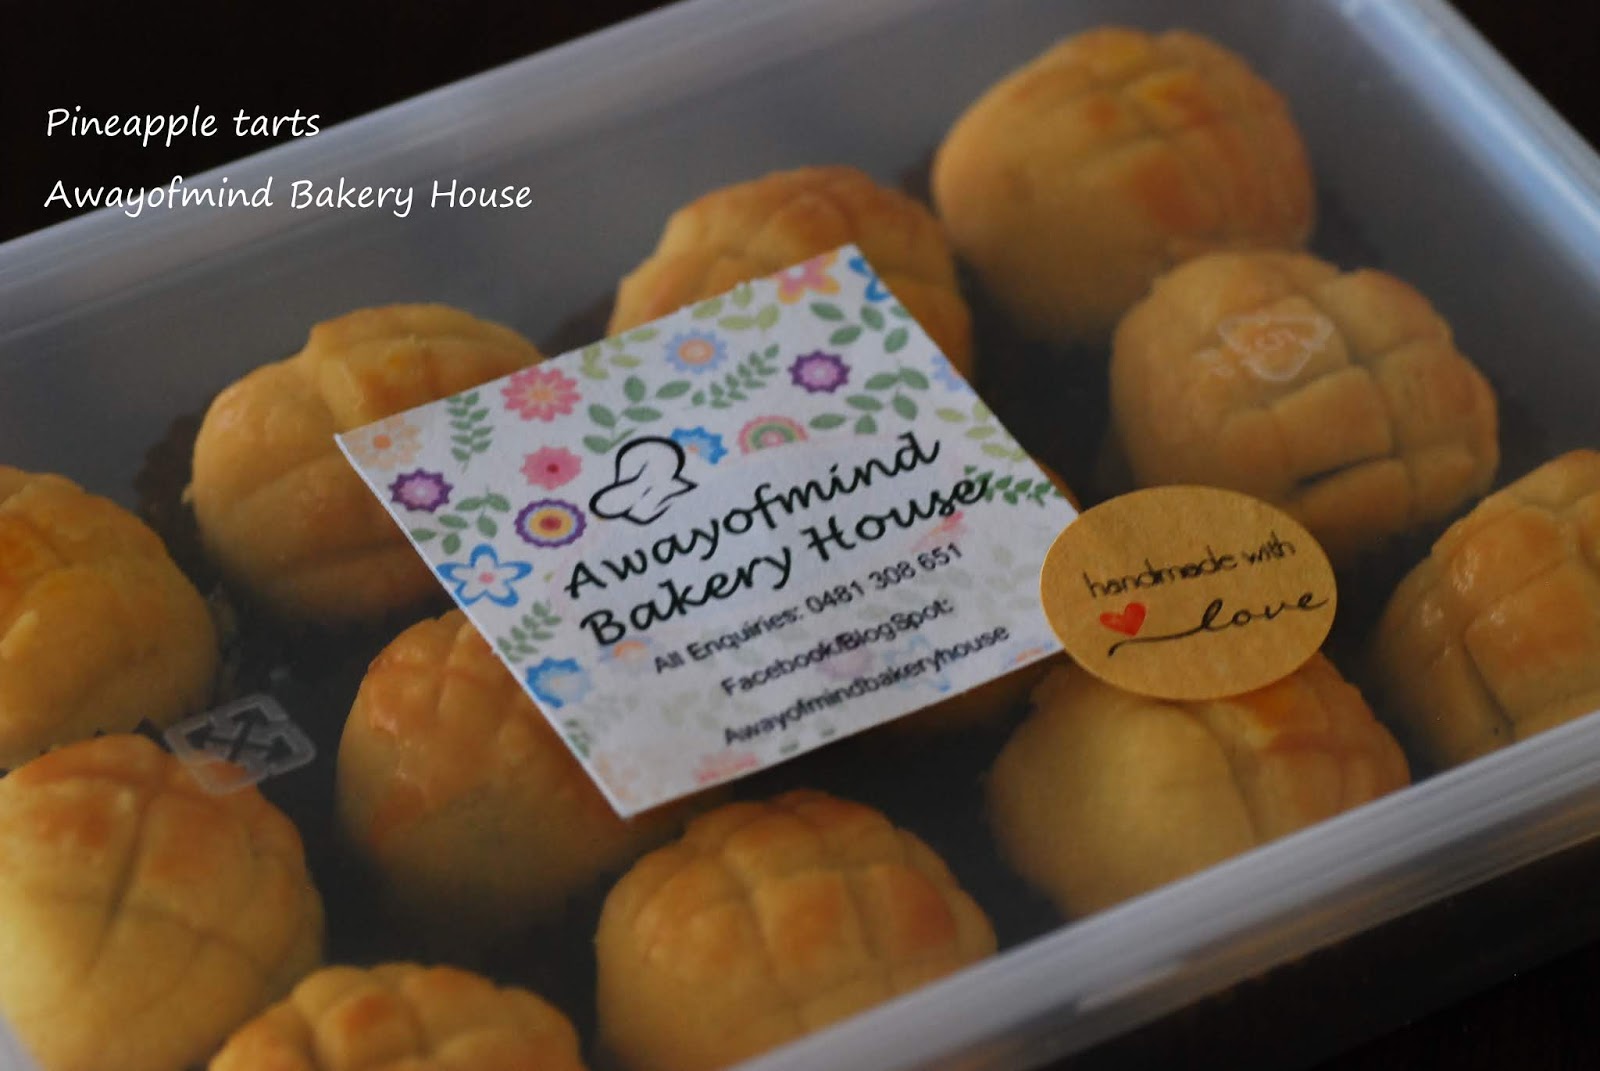
Pineapple Tarts 2018 黄梨酥
Pineapple Tarts is another "must have" during Chinese New Year, it is one of my family favourite. I have to homemade the pineapple filling again this year as it is not available in Sydney. I'm using my previous recipe for the pineapple tarts pastry and filling with minor modification.
With two big pineapples produced about 600g pineapple paste, standing in front of the wok for more than two hours is not an easy task especially have to endure the painful splatter from the boiling pineapple jam. However, the melt-in-mouth pastry will make you come back to bake this tart each year. :) The tip for a yummy pastry is using the best butter you can get, this round I'm using Golden Churn Pure Creamery Butter.
Note: I hand made the pattern on each of the pastry using dough knife.
Yield: 102 pieces (medium size tarts)
Wishing you a Happy, Wealthy and Prosperous Chinese New Year!
新年快乐!万事如意!
Recipe:
Ingredients for Pineapple Filling/Jam:
2 big pineapple puree, about 1.5kg (Blend the cut pineapple, no separation of pineapple juice with fibre)
2 tbsp of ground cinnamon
1 medium size lemon (wash and blend the lemon together with skin)
250g fine sugar (to taste, as some pineapple is very sweet and some may be a bit sour)
3 heap spoons maltose
Method:
1. It is best if you have a big wok because the juice in the pineapple can dried off easily. Mix the pineapple puree with lemon puree, add ground cinnamon.
2. Cook the pineapple-lemon puree on high heat until it is boiling, continue to cook for 30 mins before turning the heat to medium low. Add sugar, add maltose when the juice reduce to half. Continue to cook until the juice dried off and the pineapple jam turning very stiff (about 2 hours). Remember to stir the pineapple jam once in a while to prevent burning at the bottom. The pineapple jam has to fry until very dry so to produce a longer storage time for your pineapple tarts.
3. Cool down complete before keep in fridge for a day.
4. Roll into small balls, set aside for later use.
Note:
1. the cooking time may vary (mine is about 2 hours) as it is depends on the size of your wok and the juice contains in the pineapple.
2. The pineapple jam is not mean for spreading so the texture is a bit stiff so it is able to roll into a ball for the enclosed pineapple tarts.
Ingredients for pastry:
340g golden churn butter
80g icing sugar
4 egg yolks
4.5 tbsp ghee
1 tsp vanilla extract
1/2 tsp salt
550g plain flour
50g custard powder
1 tsp baking powder
1 lightly beaten egg yolk for glazing
Method:
1. Cream butter, ghee and sugar until light. Beat in egg yolks, one at a time. Add vanilla extract and salt. Beat until fluffy.
2. Fold in sifted flour ingredients and mix into a firm dough. Put dough on a work surface and lightly knead until the dough is smooth.
3. Wrap with plastic cling and place in the fridge for 30 mins. Let the dough rest and bind.
4. Roll the pineapple jam into small balls.
5. Remove dough from fridge, divide dough using a teaspoon and roll into balls.
6. Flatten a piece of dough and place a piece of the pineapple jam ball in the middle. Bring the edges of the dough together and press lightly to seal. Roll the dough between your palms to shape it into a ball.
7. Place the pineapple dough on baking tray lined with parchment paper.
8. Making pattern on the dough balls is optional.
9. Brush the egg yolk on the pineapple ball.
10. Bake in preheated over of 180C and for ~20 mins or until it turned golden brown.
11. Cool on wire rack before store in airtight container.
Almond Cookies 2018 杏仁曲奇饼
I have to clear a few packs of superfine almond powder in my pantry and decided to bake this almond cookies for Chinese New Year.
Yield: 100 pieces
Recipe:
250g superfine ground almond
100g icing sugar
230g self raising flour
180ml corn oil (depends on the flour, it could need more or less oil)
egg yolk for brushing
Method:
1. Sift together flour and icing sugar. Add in ground almond, mix well.
2. Mix in corn oil, mix well. Knead the ingredients to form soft dough.
3. Shape the dough into small balls using hands.
4. Brush the egg yolk on each of the dough balls.
5. Bake at preheat oven 170C for 15 to 20 mins.
Peanut Cookies 2018 花生饼
This peanut cookies is my family favourite, it is a must have for Chinese New Year. My hubby and son love it so much. I decided to post this year CNY baking so to update some of my recipes. We can't get the ground peanuts over here, so I toasted the blanched peanuts and blended it to fine. No egg wash for this cookies.
Yield 140 pieces
Recipe:
800g blanched peanuts
400ml peanut oil
700g plain flour
300g icing sugar
2 tsp salt
Method:
1. Spread out the blanched peanuts in a baking tray, bake at 200C for 15 mins. After the peanuts cool down, place it in a food processor and blend it until fine.
2. In a mixing bowl, sift in plain flour, add sugar, ground peanuts, salt and oil (add gradually) Mix the mixture with a spatula, then knead with hands until the dough is smooth and able to form a ball, if not add a bit more of oil.
3. Shape the dough into small balls using hands and place the dough on the baking tray. Use the back of a chopstick to make the indentation on the top of each dough.
4. Bake at 180C for 15 to 20 mins. or until the dough is turning a bit pale. Take out the cookies tray and let it cool down for 5 mins before transfer it to wire rack to cool down completely before store in air tight container.
31 March 2016
Danish Butter Cookies 2016 丹麦牛油饼干
This week I have a few baking to do. This Danish Butter Cookies recipe never fail me, it produces buttery and crunchy texture, my previous baked was sprinkled with coarse white sugar, this time I sprinkled the cookies with raw sugar. Thank you again Ann, for the recipe and cookies cutter.
Yield 52 pieces.
Recipe from Anncoo Journal
Ingredients:
1 egg (60g) lightly beaten
200g soft butter (Lurpark butter, room temperature)
320g sifted plain flour
130g sifted icing sugar
2 tbsp vanilla extract
some coarse raw sugar for sprinkle
Method:
1. Place very soft butter and icing sugar in the mixing bowl, use a spatula to cream the butter together with the sugar. Add in the lightly beaten egg, vanilla extract and flour. Mix it to form a rough dough.
2. Flatten the dough between two sheets of cling wrap with a thickness of 4~5 mm. Cut the dough with your cookies cutter.
3. Place the cookies dough on the baking tray, sprinkle with coarse sugar.
4. Bake in the preheat oven at 200C for 14 mins. or until it turned golden brown (Depends on your oven)
5. Leave the cookies to cool completely before store in airtight container.
28 June 2015
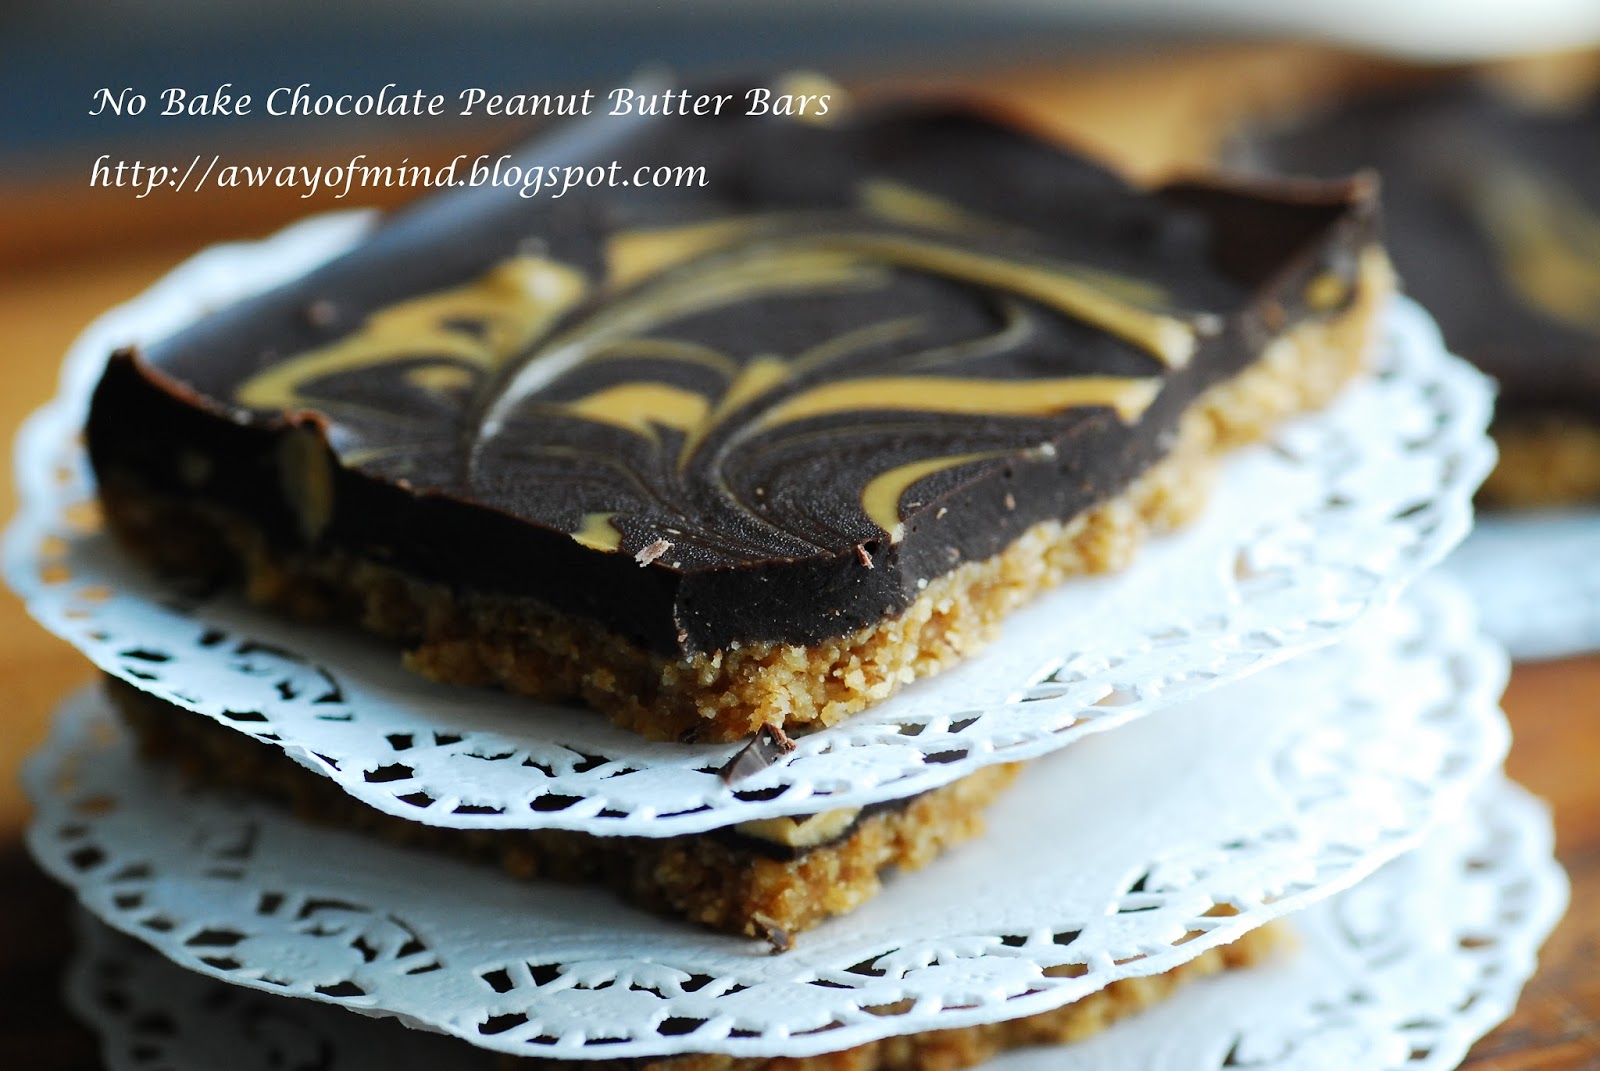
No Bake Chocolate Peanut Butter Bars
Bitter Sweet is what this chocolate peanut butter bars taste like.
It's like our life we can't see our future but only trust on God leading the way. Every time when there is a need to embark on a new path we will resist as there is unknown, there is fear. However, when you trust on God and leap forward, you see light and future. When time to say goodbye, it always sad because is either friends leave you behind or you leave them on the same place. Bitter Sweet, when there is friendship, there is stories, when there is love, there is tears.
When I saw the Tastemade's video on the No Bake Chocolate Peanut Butter Bars by Home Cooking Adventure I know is time to clear my bitter chocolate bar! I don't have enough creamy peanut butter, I add some chunk peanut butter in the chocolate layer as well. This bake is a surprise to me as it is not very sweet. This is such an easy and beautiful bake!
Yield: 16 serving
Ingredients:
Base:
200g digestive biscuits
70g unsalted butter, melted
120g crunchy or creamy peanut butter
Chocolate layer:
200g bittersweet chocolate
60g creamy peanut butter, divided into half (30g each)
Method:
1. Place digestive biscuits into the bowl of food processor, blend until it is crumbs form. Add melted butter and peanut butter, process until it is combined.
2. Line the square baking pan with parchment paper, two edges are lined longer so it will be easy to lift up when the chocolate bar is set.
3. Spread the peanut butter mixture into the prepared baking pan and compact it to create a smooth surface.
4. Melt chocolate and 30g of creamy peanut butter over a double boiler. Stir until smooth. Pour the chocolate mixture over the peanut butter layer in the baking pan.
5. In another bowl, melt the remaining 30g peanut butter over low heat, with a teaspoon, add the melted peanut butter on top of the chocolate layer, with a chopstick create swirls on the surface.
6. Refrigerate for at least 2 hours or until it is set. Let it sit 10 mins at room temperature before cutting.
17 February 2015
Dahlia Butter Cookies with Strawberry Flavour 草莓口味花开福贵牛油饼
This will be the last bake for the coming Chinese New Year, my previous baked on Dahlia Butter Cookies was with rose essence flavour, I like it but my hubby said he doesn't like the rose aroma. Today, even I still not completely feeling well, I make an effort to bake this Dahlia Butter Cookies (Kuih Semperit) again with strawberry flavour. My boy loves this melt-in-mouth cookies with his flavorite strawberry aroma! Another beautiful Chinese New Year cookies that love by my family.
May the Blessing of God be showered on you and your family, wishing you a Happy and Prosperous Chinese New Year!
新年快乐,一切顺心,身体健康,万事如意!
Ingredients:
125g butter
50g icing sugar
1 tsp strawberry essence
1 egg yolk
110g plain flour
100g corn flour
20g potato flour
a few drops of pink food colouring paste
Method:
1. Preheat oven to 140C. (oven temperature may vary depends on the capacity of your oven)
2. Line baking tray with parchment paper.
3. Cream butter with hand whisk to light, gradually add the icing sugar, whisk until it is light and pale (Make sure to cream the mixture until smooth, this will result in melt-in-mouth cookies texture). Add egg yolk and strawberry essence. Mix well.
4. Sieve all flour together, add into the butter-egg mixture, stir with spatula until combine.
Knead the dough with hand until smooth.
5. Take 1/3 of the dough, mix with a few drops of pink food colouring. Knead the dough well.
6. Put some plain dough and some pink dough in the big nozzle (I used Wilton 847 big nozzle without pipping bag), push it out using your thumb, press out the dough on the prepared baking tray.
7. Bake at 140C for 20~25 mins until the cookies is slightly brown (Watch your oven, not to burn the cookies). Take out the baking tray and cool the cookies on wire rack completely before keep in airtight container.
13 February 2015
Valentine Rainbow Heart Cookies 情人节心型采红曲奇
第一次这面子书上看到Eugenie Kitchen的情人节心型采红曲奇就大大喜欢,於是就动手弄了。烘焙这种采红曲奇真的还得花点耐心,还有得计划好面团的厚度,这是成功的关键得记得哟!成品是亮丽的香脆牛油曲奇。。。我的牛油曲奇过早切面团了道至曲奇的背面不工整。
Fall in love with Eugenie Kitchen's Rainbow Heart Cookies when I saw her video on Facebook for the first time! Swung into action to bake this beautiful Rainbow Heart Cookies. I'm going to say that this is not a simple task as it involved lot of patient for the cookies dough to harden in the fridge and you need a little planning on the cookies dough thickness.
The height of the dough before cutting has to be the same height as your cookies cutter. When you are flattening the dough, you have to estimate with your cookies cutter on what is the maximum number you can cut out from the dough, then decide the wide and length of the dough you are flattening. For my case, I want to cut out two hearts on each slice of the dough and with the cookies cutter thickness, I have four slices of the dough stack. I got 9 rainbow hearts. With one salvage from the left over dough.
The end result is an awesome, attractive, crunchy butter Valentine Rainbow Heart Cookies that everyone who want to eat it will say "I love you!" Hahahaha!!! My hubby said it!!
Happy Valentine's Day!
Note: For future bake on this cookies, I will prefer using 160C~170C to prevent the browning on the side of cookies. My cookies was baked at 190C for 10 mins.
You can watch Eugine Kitchen Rainbow Heart cookies video on You Tube here
Ingredients:
170g unsalted butter, soften
155g icing sugar
a pinch of salt
5ml vanilla essence
3 egg yolks
310g cake flour
food colouring: red, pink, yellow, blue, green and purple
egg white (to stick each dough together)
Method:
1. In a mixing bowl, cream the soften butter then add in icing sugar, hand whisk until the butter mixture is light and fluffy.
2. Add salt and vanilla essence, mix well.
3. Add egg yolks, one at each adding, mix well in each adding.
4. Sift in cake flour, fold the flour with butter mixture.
5. Knead the cookies dough well until it is not sticky to hands.
6. Divide the dough with 1/3 plain dough, for the remaining 2/3 dough continue to divide into 6 portions with rainbow colour as you wish.
7. Knead well for each dough and wrap in individual plastic cling and keep in fridge for 15 mins.
8. Take out the colour dough flatten the dough between two pieces of plastic cling to your plan thickness and size. Keep them back to fridge for 15 mins, or until the dough is a bit hard.
9. Lay red dough square on a piece of plastic cling, apply egg white on the red dough. Stack with pink dough, apply egg white on the surface of pink dough. Then lay the yellow dough square on the pink dough, apply egg white on the surface of yellow dough. Stack the blue dough square on the yellow dough, apply egg white on the surface of blue dough. Stack the green dough square on the blue dough, apply the egg white on the surface of the green dough. Stack the last purple dough square on the green dough. Press the dough square lightly so they are sticking well. Wrap with plastic cling and keep in the fridge until the dough is hard.
10. Slice the dough into four slices, use the heart shape cookies cutter to cut out two hearts from each slice. You will have beautiful rainbow hearts, keep the rainbow hearts in fridge until the dough is harden.
11. Stack the rainbow hearts together with egg white. Let it set or harden in fridge.
12. Take out the plain dough, wrap it to cover the rainbow heart. Wrap the dough with plastic cling and keep in the fridge until it is harden.
13. Slice the dough into the thickness you want. Bake in oven at 190C for 10 mins. (I find the temperature is too high for my oven, it should be bake at 160~170C in future)
06 February 2015
Dahlia Butter Cookies (Kuih Semperit 花开福贵牛油饼)
This Dahlia Butter Cookies was on my baking list for long, but I didn't take any action thinking I'm not good in cake pipping. I was wrong! One day when I was searching on the web, I chanced on Nasi Lemak Lover's blog, she shown us the tool she used for her Dahlia Cookies which make me think that I should try baking one.
I tried on a few pipping tips but it is the Wilton 847 big nozzle that work for me. I pushed and pipped the dough using my fingers without the pipping bag. This is actually a beautiful festive bakes with its unique rose aroma, of course who can resist the melt-in-mouth cookies. This cookies really make me feel that Chinese Lunar New Year is near!!
这是好久以前就想烘焙的牛油饼,那时的我看了以为很难的挤花后来才知道不难!所以说在生命里没有不能成的事,难在人心成事在人!我用了不同的挤花尝试,后来找出Wilton 847 大挤花头是用手直接把面团塞进花嘴挤出的。这是一道很漂亮的应节牛油饼,我想大家都会喜欢它那独得的玫瑰香还有酥滑的牛油口感。 这道牛油饼真的把过年的气息带来卡达尔了!
Thanks Jane for the recipe and Sonia for showing how to pipe the Dahlia Flowers. This recipe is a keeper as it doesn't distort the shape of the flower after baked!!
Ready for the oven!
Ingredients:
125g butter
50g icing sugar
1/2 tsp rose essence
1 egg yolk
110g plain flour
100g corn flour
20g potato flour
a few drop of pink food colouring
Method:
1. Preheat oven to 140C. (oven temperature may varies depends on the capacity of your oven)
2. Line baking tray with parchment paper.
3. Cream butter with hand whisk to light, gradually add the icing sugar, whisk until it is light and pale. Add egg yolk and rose essence. Mix well.
4. Sift the flour together, add into the butter-egg mixture, stir with spatula until combine.
Knead the dough with hand until smooth.
5. Take 1/3 of the dough, mix with a few drop of pink food colouring. Knead the dough well.
6. Put some plain dough and some pink dough in the big nozzle, push it out using your thumb, press out the dough on the prepared baking tray.
7. Bake at 140C for 20~25 mins until the cookies is slightly brown. Take out the baking tray and cool the cookies on wire rack completely before keep in airtight container.
Peanut Cookies 花生饼
Peanut Cookies is sure in my menu because it is one of my hubby's favourite! This was the second batch I baked in a row, this year I changed the peanut cookies pattern a bit, it is with indentation in the middle. My first batch of peanut cookies actually didn't take the indentation well, the cookies dough cracked when I made the indentation in the middle. So I added more oil for my second batch of baking so the dough is able to bind well.
To get a smooth peanut cookies, you need to use icing sugar and make sure you knead the dough well! Love this crumbly and addictive cookies!! Oops! the top of the cookies is way too dark...next time no more adding of golden syrup in the glaze.
想家的时候。。。就是一直在厨房弄着想恋又熟悉的食物。把那对生命的热诚都化成了热量吃进肚子里了。。。所以说不在这个季节变胖是假的!!但是哟。。。那花生饼是真的弄得有点黑过头了啦。。。下次不会在蛋液里加糖酱了!!
Ingredients:
500g fine ground peanuts
200ml peanut oil (may need to add a bit more oil, it depends on the flour you used)
400g plain flour
200g icing sugar
1 tsp salt
1 egg yolk for glazing + a few drop of golden syrup (should not add golden syrup next time)
Method:
1. Bake the ground peanuts in the oven on low heat until fragrant (120C for 15 mins)
2. Sift the plain flour into bowl, add sugar, ground peanuts, salt and oil (oil has to add gradually, stop when the dough can hold up into ball). Mix the mixture with a spatula then knead until the dough is smooth.
3. Make the peanut balls using hands, place the peanut balls on lined baking tray.
4. Glaze with egg and used the back of a chopstick to make indentation on top of each peanut ball.
5. Bake at 180C for 15-20 mins. or until the cookies turned slightly brown.
Subscribe to:
Posts (Atom)