14 December 2016

Bake & Celebrate: Cookies and Treats


It is available at the bookshop! Thank you Marshall Cavendish International (Asia) Pte. Ltd. for giving me the opportunity to contribute to this cookbook. 

This book contains 42 recipes for irresistible cookies and treats lovingly contributed by selected top food and lifestyle bloggers and instagrammers from Singapore and the region. It will be a wonderful gift for family and friends during this festive season! 


28 October 2016

Something Exciting On Its way!


Hi everyone, this post is just to give you a heads-up that "Bake & Celebrate: Cookies and Treats" Cookbook will be coming soon! This book will publish one of my Chinese New Year cookie recipe! 

15 September 2016

Lychee Liqueur Pumpkin Snowskin Mooncakes


It was not easy for me to squeeze out time to do baking and blogging nowadays. I'm busy with finding the right renovation contractor to renovate my house, so much work at our end, hopefully it will all go smoothly. 

I have a gathering to attend this Saturday, I baked some Taiwanese Style Baked Mooncakes and this one ... the Lychee Liqueur Pumpkin Snowskin Mooncakes which made my heart pumping again!!! 


The first time I tasted the Lychee Liqueur Snowskin Mooncakes was about two years back, one of the friend in Doha introduced us to this taste. From there on, I tried many ways to locate the Lychee Liqueur. Few weeks ago, I tried a batch of snowskin mooncakes using lychee syrup mixed with Carbernet Merlot, the taste can't beat this one. The Lychee Liqueur I used is made in France with 20% alcohol. I'm the type of person who can't drink alcoholic drink, a sip of it is enough to make my head feel dizzy the whole morning. :)

This round, I modified and created a new recipe for this Lychee Liqueur Pumpkin Snowskin Mooncakes using a pandan snowskin mooncake recipe. Partial of the flour has to be steamed and it produced awesome Q bouncy texture for the snowskin. The dough is very easy to handle and it doesn't stick to the mold at all. 

If you have friends to entertain during this festive season, I think this recipe will sure make a good impression. Happy Mid-Autumn Festival! 

Yield: 32 mini snowskin mooncakes


Ingredients:
Filling~32g, snowskin dough~30g

260g Kao Fen (cooked glutinous rice flour)
70g Wheat starch 
70g cake flour
300g icing sugar
100g shortening, soften 
140g Lychee Liqueur (you can add more if want to have stronger taste, reduce the water portion if you do so)
160g water

1/4 tsp green tea powder, add 1 tsp water
1/4 tsp red yeast powder, add 1 tsp water
some butterfly blue pea flower, soak 30 mins in 30ml hot water, squeeze out the blue juice and get 1 tbsp of the blue juice

Filling:
1kg store bought pumpkin lotus paste
150g sunflower kernels 
(mix the sunflower kernels with pumpkin lotus paste and divide it into 32 portions)

Method:
1. Mix the wheat starch and cake flour together, steam for 5 mins, remove the flour from steamer, let it cool down a bit then sift the flour. Mix the flour mixture with Kao Fen.
2. In a small pot, add water with icing sugar and shortening together, bring to boil until shortening melted, stir with a hand whisk.
3. Pour the hot liquid mixture to the flour mixture. Use spatula to stir mixture to form a soft dough, add the Lychee Liqueur knead the dough to form bouncy smooth dough using hands.
4. Divide the dough into 4 portions. 
Add one portion of the white dough to green tea powder mixture, knead the dough to smooth, wrap it with plastic cling and keep in fridge for 30 mins. 

Add another portion of white dough to red yeast powder mixture, knead the dough to smooth, wrap it with plastic cling and keep it in fridge for 30 mins. 

Add the third portion of white dough to butterfly blue pea flower juice, add the juice slowly to get the blue you like. Knead the dough to smooth, wrap it with plastic cling and keep it in fridge for 30 mins. 

Remain the last portion of dough white, wrap it with plastic cling and keep it in fridge for 30 mins.

5. Depends on the mooncake mold you use, divide the dough (for my case each colour dough I divided into 8 portions). Measure dough to about 30g each and wrap in 32g pumpkin lotus paste or any other filling you prefer.

6. Flatten the snowskin dough and wrap in the filling. Press firmly the dough into press mould. Unmould the snowskin mooncake and store in an airtight container.
7. Chill snowskin mooncakes before consuming. 


27 June 2016

Muah Chee (Glutinous Rice Snacks with Peanut and Sugar)


Muah Chee the soft and chewy glutinous rice cake coated with peanut and  sugar... it was not my childhood favourite snack. I only get to try out this Asian snack when I was living in Singapore. My hubby loves this snack very much, I can remember we always buy it from a stall in Chinatown whenever we go there. 

I made Muah Chee years back using microwave method, it was very easy. This round I'm using the recipe which need to cook and fold the dough until it is done. When I was trying out this recipe, I discovered it was hard for us to judge when we should stop folding the glutinous rice dough, it took me a while to exercise my fingers! ^^ The ratio for flour and water has to be 1:1. I'm over joy with the end result. If you make too much and can't finish consume it within a day, you can store it in a airtight container on the kitchen top overnight, reheat in the microwave for a 25 seconds will bring it back to the softness just like freshly make.  


You can watch Loft48 video on how she cooked and folded the dough here

yield: 6 serving


Ingredients: 
2 cups glutinous rice flour
2 cups water
1/2 tsp salt
250g ground peanut powder
100g sugar (to your liking)
3 tbsp peanut oil (cooking dough) + 2 tbsp gradually add when folding the dough

Method: 
1. In a container, mix the ground peanut powder, sugar and salt together. Cover and set aside for later.
2. In a bowl, mix the water with glutinous rice flour, mix well.
3. Heat up a non-stick pan at low heat with 3 tbsp of peanut oil, pour in the flour mixture. Using a plastic spatula, gently stir the mixture, keep stirring until the mixture thicken. Use the spatula to pull together the mixture and form a rough dough. 
4. Use a pair of chopstick, each side of your hand handle one and start folding the dough inward, drop a few drops of peanut oil on the dough while you are doing the fold to prevent the dough sticking on the pan. Continue until the dough totally pull away from the side and bottom of the pan, and form smooth dough. 
5. Cut the dough with greased scissors into smaller dough and place it into the peanut mixture container, cut the dough into smaller pieces and coat it with more peanut and sugar. Serve warm. 


23 June 2016

Takoyaki (Japanese snack)


First time making Takoyaki, I'm using a recipe given by a friend. The ingredients used are a bit different from the traditional Takoyaki as there are Parmesan cheese and milk in it. 

When I recount how I had tracked and bought the Takoyaki machine, I laugh at myself and I believe the friends who went through that moments with me will still laugh together with me too. That's how the life I had in Qatar, miss you all over here.

Yield: 38 pieces


Ingredients:
1.5 cups cake flour
1 tbsp corn flour
1 tbsp baking powder
1 egg
1 cup full-fat milk
1/2 tsp peppers/salt
1 tbsp salad oil or vegetable oil
2 tbsp Parmesan cheese
3 tbsp shredded carrot
4 pieces of baby octopus, cut into small

Topping:
Roasted sesame sauce
Bulldog Ouchide Honkaku Okonomi sauce
some Bonito flakes 


Method:
1. In a mixing bowl, add cake flour, corn flour, baking powder, egg, milk, peppers/salt, vegetable oil, and Parmesan cheese. Mix well. Then add shredded carrot.
2. Heat up the Takoyaki machine with some oil coated on each holes. (As my machine not able to adjust the heat, I switch it off when the machine is over heating, or else you should use medium-low heat to cook the Takoyaki balls) 
3. Pour the batter into each of the holes, top with a piece of octopus (if the octopus piece is very small you can put 2 or 3 pieces), use two skewers to flip the excess batter inwards to the hole, in the mean time, turn and flip each balls to 180 degree, you will see it starts to form nice round shape and keep turning until the ball is evenly brown. 
4. Top with some roasted sesame sauce, bulldog Ouchide Honkaku Okonomi sauce and sprinkle with some bonito flakes, serve warm. 

18 June 2016

Sweet and Sour Sticky Short Ribs


This sweet and sour sticky short ribs is one of my family favourite dish! The original recipe called it Gao Sheng Pork Ribs (高升排骨)because of the portion of its ingredients. One part rice wine, two parts sugar, three parts Chinese white vinegar, four parts the light soy source, five parts water, the increase of its ingredients ratio, that's why they name it. I didn't follow the quantity of the original recipe because I don't want to add too much light soy source and sugar in it.  

It is a very delicious short ribs dish, and easy to prepare from our home kitchen. The secret for a delicious plate of sweet and sour sticky short ribs is you have to first deep fry the short ribs with low heat then turn to high heat before stir fry it with seasoning. This will ensure the short ribs is cooked and tender. 


Ingredients: 
500g short pork ribs
50g rice wine
90g sugar (to taste)
100g Chinese white vinegar
100g light soy source
250ml water 
a dash of black peppers
1 tsp of fermented red bean curd 

cooking oil enough to do deep fry

Method:
1. Wash the short ribs properly. Marinate the short pork ribs with fermented red bean curd, 30g of sugar and a dash of black peppers, cover and set aside for at least an hour in fridge. 
2. Heat up a small pot with cooking oil enough to do deep frying. When you lower a pair of chopstick, there will be bubbles appears beside the chopstick that mean the oil is ready for deep frying. Lower the heat to medium-low, place the marinated short ribs in. Deep fry for about 4 mins or until the short ribs turns light golden brown. Turn the heat to high, continue to deep fry until the short ribs is cooked. Fish out the short ribs on the kitchen paper to drain excess cooking oil.
3. In a bowl, stir together the remaining 60g sugar, rice wine, vinegar, light soy source and water. Heat up a wok with 2 tablespoons of cooking oil, place the deep fried short ribs into it, add the seasoning mixture, stir fried with medium heat until the source thicken. Taste the source, add sugar if necessary. Serve warm. 

17 June 2016

Red Rubies with Coconut Milk


This is another backlog post, made the red rubies dessert while I was still in Qatar. Bought the pack jack-fruit from Family Food Centre. 

Usually you will find this dessert on the menu of Thai restaurant. They called it Tub Tim Grob. The red ruby is actually water chestnut coated with tapioca flour and red food colouring. The crispy ruby and the sweet Jack-fruit match so well with coconut milk! 

Homemade the red rubies is fun, this dessert is lovely for summer! We are now entering the Winter session over here, miss the sunshine in Qatar where all the plants grow and blossom during their Winter session. 


Recipe from Table for 2 ...or More with minor changes
Ingredients A:
6 water chestnuts (I used can water chestnuts)
1/2 tsp red food colouring
1 tsp water
1 cup tapioca starch/flour
few pieces of jack-fruits tear into strips

Ingredients B:
125g sugar
125g water
1 pandan leaf, tie a knot

Ingredients C:
200ml thick coconut milk
750g ice cubes


Method:
1. Prepare the syrup: In a small pot, bring ingredients B to boil, when sugar dissolved, switch off the heat, let it cool down, remove the pandan leaf.

2. Prepare the red ruby: chop the water chestnuts into 5mm cubes. In a bowl, mix food colouring with water. Add the water chestnut cubes into the food colouring mixture. Toss the bowl to coat well. 

3. In another bowl, place the tapioca flour, place the dyed water chestnuts into the tapioca flour bowl. Toss and coat well. Prepare a colander, pour all the water chestnuts into the colander, sift and collect the excessive tapioca flour. 

4. Spray some water onto the water chestnuts, you can see the surface of the water chestnuts will turn moist but not wet. Place the water chestnuts back to the bowl where you collected the excessive tapioca flour, coat the tapioca flour for second time. 

5. In a pot, bring water to boil, prepare another big bowl with ice water in it. Pour the water chestnuts into the boiling water, stir gently and let it boil on high heat for 1 min. Remove the water chestnuts from the boiling water using a slotted ladle, and put it into the ice water immediately. Let it sit in the ice water for 10 mins.

6. Prepare the coconut smoothie: Using a blender, blend the ice cubes, syrup and coconut milk together til fine. 

7. Assemble: In a serving glass, place the coconut smoothie, top with red rubies and sliced jack-fruits. Serve cold. 


16 June 2016

Kale Avocado Banana Smoothies


Kale is the popular vegetable at my home since I get to know of its nutrition facts. It belong to cabbage family and like other leafy greens it is loaded with lot of antioxidants, can help lower the cholesterol, etc. The best part is it can be added to our diet very easily, for instance, by adding Kale in salad or smoothies are some easy ways I usually do.

Just by simply adding a small bunch of Kale, the nutrient of this smoothies increase a lot! You can add whatever quantities of kale, avocado, and banana to suit your family taste, there isn't any fix recipe for this smoothies, if you like the smoothies to be more creamy and thick, add less milk. If you love the smoothies to be more runny, add more milk to it. Just that! 


Ingredients: 
yield:  4 serving
a bunch of kale, cut into bite size
1 big size avocado, deseed, cut into small
1 banana, cut into 4 pieces
1 lime juice
3 tablespoons honey
400 ml milk 

Method:
1. Place all ingredients into a blender, blend for a few mins until there is no big chunk of vegetables. 
2. Pour into serving mug, serve immediately. 

15 June 2016

Japanese Cotton Cheesecake (8" round pan)


Trying out my new one piece Mondo 8" round pan, 4" height, I bought it online from Baking Pleasure. Well, because of this Japanese Cotton Cheesecake...my kitchen has a few new baking pans! Add to the previous attempts, this is the sixth!

Oh dear! Again! The surface peeled when I trying to flip the cake over. I use a different silicon cake mat not the Silpat mat! Put aside the sad incident....the cake texture is very good, soft, light and cottony cream cheese texture! 


Ingredients:
egg yolks batter
250g cream cheese
6 egg yolks 
70g sugar
60g butter
100ml full cream milk
1 tbsp lemon juice
60g cake flour
20g corn flour
1/4 tsp salt
2 tsp vanilla extract

egg whites batter
6 egg whites
70g sugar

Method:
1. Prepare the baking tin: Grease the 8 inch round baking tin, line the bottom of the tin with parchment paper. 

2. In a big bowl, melt the cream cheese, butter and sugar on a double boiler. Whip the mixture using a hand whisk until it is creamy and smooth. Remove from the double boiler, add egg yolks, continue to whisk the mixture. Add milk, vanilla extract, lemon juice. Gently add the sifted flour mixture (cake flour, corn flour and salt) Sieve the egg yolks mixture and set aside.

3. In a clean mixing bowl, using electric mixer, whisk the egg whites until it is foamy, add in the sugar in three batches. Beat the egg whites until soft peak just before the stiff peak. 

4. Take 1/3 of the egg whites mixture, mix it to the egg yolks mixture. Then fold in remaining egg whites mixture to the egg yolks mixture in two batches. Pour the batter into the baking tin, knock the baking tin on the worktop once to release air bubbles. 

5. Pour hot water on a bigger baking tray and let the 8 inch baking tin sit in the hot water. Bake the cake in a preheated oven (top and bottom heat, without fan mode) at 140C for 1 hour 15 mins, in the lower rack of the oven. Remember to place an oven thermometer in the oven to check the actual oven temperature, adjust the heat accordingly. 

6. After the cake is done, switch off the oven heat and let the cake sit in the oven with oven door ajar for 30 mins. Take out the cake from the oven and flip the cake out using a silicon mat to prevent the cake top stick and peel. 

7. Cool down the cake completely before slicing. 

12 June 2016

Ban Jian Kuih (Peanut Pancake)


Ban Jian Kuih (Peanut Pancake) is not only my childhood favourite snack but also my son favourite snack too. It is hard to imaging my boy like this Asian street food so much!! This round I'm trying out another recipe which is without yeast but with baking powder. I didn't use the alkaline water and baking soda. 

The verdict: The Ban Jian Kuih is crispy while it is out from the pan, make sure you know how to store it to prevent condensation which will soften the Ban Jian Kuih. 


Recipe from Jane's Corner with minor changes
Ingredients:
200g all purpose flour
2 tsp baking powder
3/4 tsp baking soda (omitted)
1/2 tsp salt
50g sugar
160ml water
160ml milk
1 egg
40g melted butter
1 1/8 tsp alkaline water (omitted)

Filling
100g coarsely grind toasted peanuts
80g sugar
80g creamed corn 
some melted butter to brush on the pancake

Method:
1. In a large bowl, add in all ingredients for batter.
2. Mix well into a smooth batter and set aside in fridge for overnight. 
3. Heat up a non-stick pan (4" pan) with some oil, wipe off access oil with kitchen paper.
4. Pour half ladle batter into the pan and make a swirl of the pan so that the pan is thinly coated with batter.
5. Cook for 1 min on low heat. The centre of the pancake will turn holey. Brush the pancake with some melted butter, sprinkle some peanuts, sugar and creamed corn. Cook until the centre of the pancake is cooked and the edges is lightly brown. 
6. Use a butter knife to remove the pancake from the edges, fold it into half. Serve hot.

10 June 2016

Kuih Lapis Legit (Spekkoek) 印尼式千层糕


I baked this Indonesian style Kuih Lapis Legit or multi-layers spice cake two weeks ago, it was not a perfect cake as the distinctive layering are not obvious on some layers, this cake has 15 layers, there were holes between layers too. 

I notice there are many difference recipes used by bakers, put the number of eggs a side, we can category the recipes into two common one. One type of recipe is only using egg yolks and the other one is using egg yolks and egg whites with the ratio 2:1. I'm trying out with the later.


This is a very time consuming bake, you need to spend about two hours plus in front of the oven and the 20 eggs use is not a joke but really high in cholesterol too. However, to whoever would like to take up this challenge, my suggestion is go ahead! The end result is really rewarding, the cake is filled with spice fragrant, moist and very delicious! Anyway, please eat in moderation! The Kueh Lapis Legit is served in thin slice and it can be left out on kitchen top for up to five days time, if you are not going to consume it so soon, you can wrap it up with parchment paper and cling wrap before store it in freezer.    


Recipe from Wen's Delight 
Ingredients A:
500g soft butter
200g condensed milk
2 tbsp rum liquor
150g cake flour
1 tbsp kueh lapis spices (or mixed spices contained ground cinnamon, cardamon, nutmeg, clove and ginger) 
20 egg yolks
100g sugar
2 tbsp SP /Ovalett (option, is a cake stabilizer)

Ingredients B:
10 egg whites
90g sugar

Method: 
1. Preheat oven at 200C with top and bottom heat. (using 8" square tin greasing and lining the base with baking paper)
2. Using electric mixer, cream butter until light, gradually add condensed milk and rum liquor, mix at medium speed for about 5 to 10 mins, until the mixture is fluffy and creamy. Add in the sifted flour and kueh lapis spices. Mix well and set aside.
3. In another electric mixer bowl, whisk egg yolks, sugar and SP at max speed until thick and pale, or until it is ribbon stage. (About 3 to 4 mins, if without SP will need about 10 mins) Gradually add this mixture into butter mixture, mix well. 
4. In a clean bowl, using electric mixer, whisk egg whites until foamy, add sugar in three batches, mix at max speed till medium firm peak.
5. Take 1/3 egg whites out and mix into the egg yolks butter mixture. Mix well. Then continue by folding in the remaining egg whites to egg yolks butter mixture, until all well incorporated.
6. Place the baking tin in middle rack of the preheated oven for 5 mins. Take out the preheated baking tin, scoop a ladle of batter and spread it on the baking tin (always take the same amount of batter), use the back of the ladle spread the batter evenly in the baking tin. The batter melt once it get contact with heat, it will take about 5-7 mins to bake the first layer. Then take out the baking tin, turn the oven to top grill function. Use a metal fondant presser, lightly press and smooth out each layer. If there is bubble on the cake, use a toothpick to break it. 
7. Continue with second layer of batter and grill for 4-5 mins, do the same for remaining batter until finish the batter. 
8. For the last layer of batter, use oven bake function, bake the cake at 180C for 15 mins.
9. Take the cake out from baking tin once it is done. Cool down the cake completely before slicing.

Note:
1. You may have to adjust the oven temperature if the cake brown too fast. You need to cook the cake properly before topping it with another layer of batter. 
2. Place a tray of water inside the bottom of oven if you are using top and bottom heat function, this will prevent burning of the bottom of the cake. 


03 June 2016

Pan-Fried Buns with Chives and Pork Filling 韭菜猪肉馅饼


It has been a while since I last make a Chinese bun. This afternoon I made 24 pieces of pan-fried buns with chives and pork filling. This is a delicious juicy meat bun with crispy outer layer. Today the filling is very special because I added about 200g of my leftover roasted pork belly in it too! My family love to eat this pan-fried bun with Chinese black vinegar and "Loaganma" brand chili.

The bun dough is without yeast in it, it is consider easy to make. 


After pleating, use the palm to press on the bun to flatten it


Referring to Carol's recipe with modification on the filling
Ingredients for dough (24 pieces): 
500g all purpose flour
40g vegetable oil
1/2 tsp salt
200ml hot boiling water
50ml cold water (gradually add in, add more if the dough is too dry)

Ingredients for filling:
200g roasted pork belly, chopped into small 
200g minced pork
a bunch of spring onion, chopped into small rings
1 tbsp minced ginger
a bunch of chives, chopped into small 
1 egg

Seasoning: 
100ml shao xing jui (Chinese rice wine)
50ml cold water
1 tbsp sesame oil
1/2 tsp salt
1.5 tsp of corn flour
a few days of ground black peppers 
2 tbsp oyster sauce


Method:
1. Prepare filling: In a big bowl, place the minced pork, minced ginger, egg and all seasoning in it. Use a pair of chopstick to stir the meat mixture in one direction until all liquid is absorbed by the meat and the meat turn a bit gooey. Add the chopped roast pork belly, chopped spring onion and chives in it, mix well. Keep in the fridge for later use. 

2. Prepare the dough: In a mixing bowl, place the flour, vegetable oil, salt, and pour in the hot boiling water, using electric mixer, mix in low speed, gradually add the cold water. (on and off use the hand to feel the dough texture, if the dough is dry, add a bit more cold water) When the dough come together and form a soft rough dough, stop the electric mixer. 

Take the dough out and place on a clean worktop, knead the dough with hands until the dough is smooth. Place the dough in a lightly grease container and let it rest for an hour. 

After resting the dough, take the dough out and knead it into a long log, divide into 24 small dough balls. Take a small dough ball, flatten it with rolling pin and place a tablespoon of filling in the middle. Pleat and seal the bun. Use the palm to flatten the bun a bit. Doing the same for remaining dough.

3. Cooking the bun: Heat up a flat pan with 3 tablespoon cooking oil, place and arrange the bun neatly in the flat pan, lower the heat to medium-low, pan fried the buns until golden brown on both side. Serve warm. 


31 May 2016

Japanese Cotton Cheesecake (A record on my attempts)


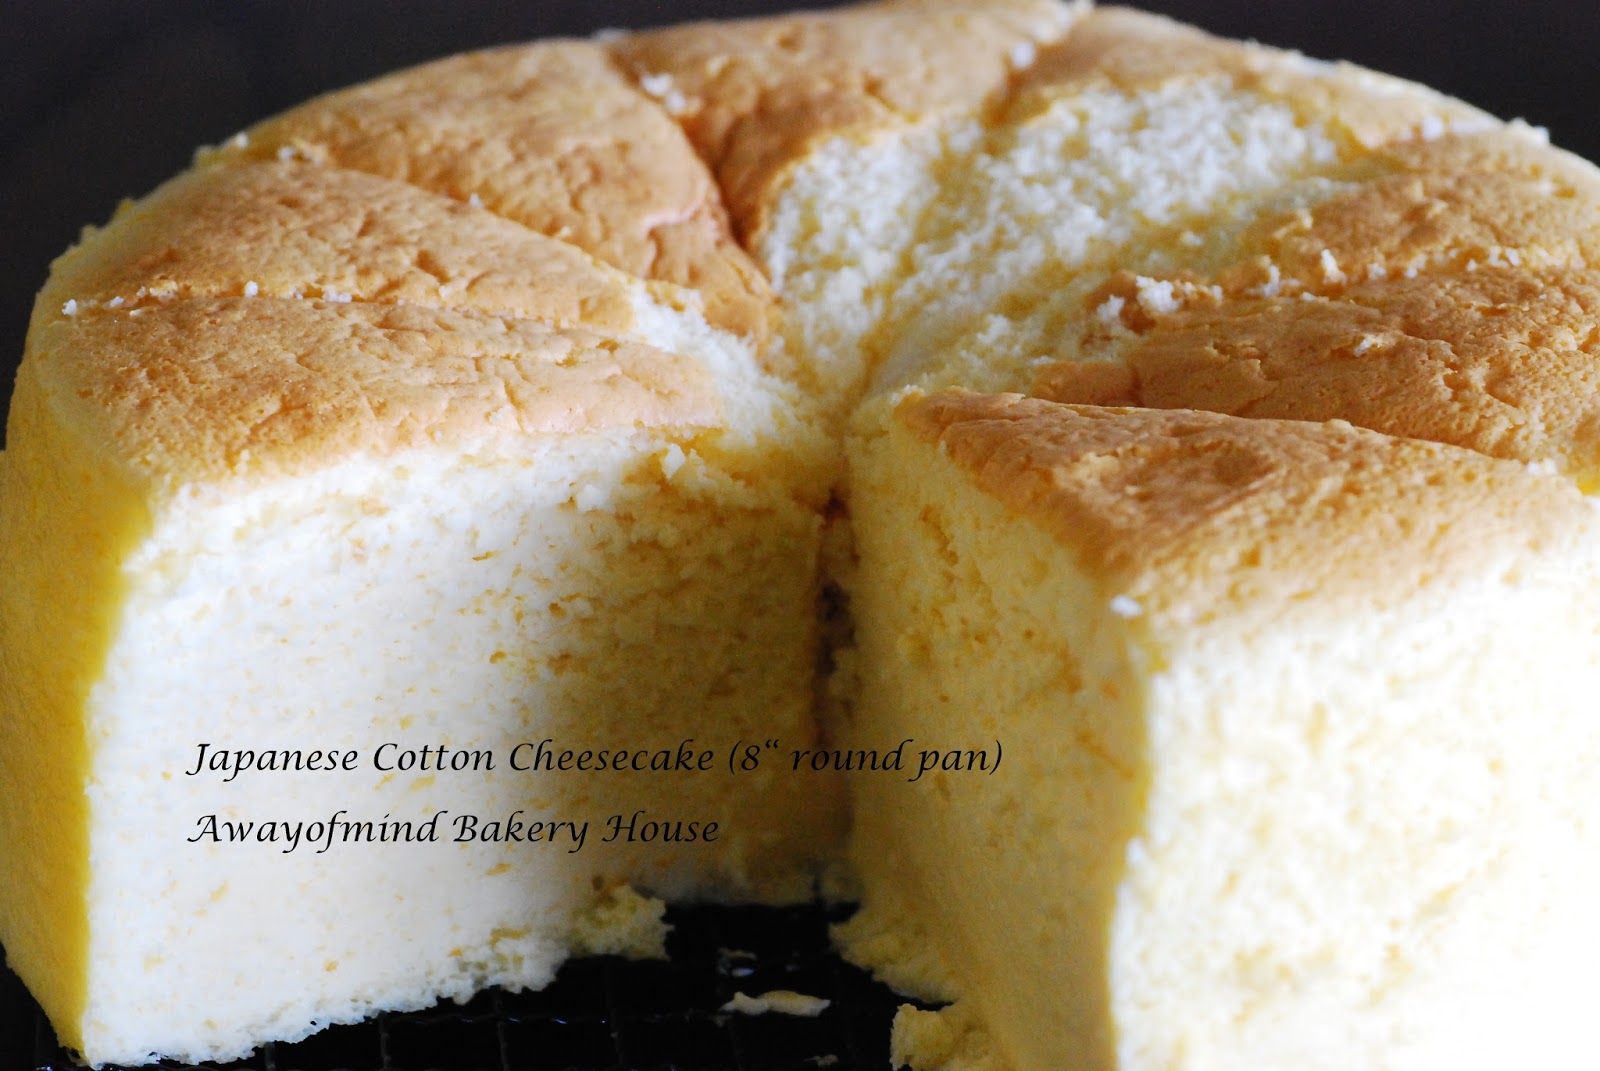
4th attempt, a tall cheesecake but the top peeled when I tried to flip the cake

I'm challenging myself to bake a perfect Japanese Cotton Cheesecake with that soft, light and cottony cream cheese texture, perfect smooth top and side of the cake... however, this challenge seems not easy to take on. This post is to record and share my attempts on baking the Japanese Cotton Cheesecake, hopefully when you take on this challenge it will be a bit easier for you, of course you have to test your own oven to get the prefect result. 

Most of the recipes on the Internet seems similar, however, some people spelled out differently how they prepared the baking tin, what type of baking tin they used and the various oven temperature they set for their cheesecake...all these are important. I personally had tried many ways too, total of five attempts so far, and I find the perfect smooth cake top is the one very hard to achieve. Overall, the cheesecake texture from all my attempts were good except the 3rd attempt.

My first attempt:
I used 8 inch black round springform cake pan, oven temperature set as 160C, greased and lined the side and bottom as the recipe didn't tell me not to use black baking tin and the recipe said baked at 200C then lower temperature to 160C. So even I baked at 160C, I ended with my cake cracked on the top, of course the side of the cake is not the perfect smooth too. 

second attempt:
I used black oval one piece baking tin, oven temperature set as 160C, greased and floured the side and bottom of the baking tin. My cake ended with ugly wrinkle on the side, the cake shrank and created wrinkle on the top too.

3rd attempt:
I used 8" aluminium springform cake pan as shown in a video recipe, I wrapped the baking tin with double layers of aluminium foil, oven temperature set as 150C, lined the bottom of baking tin, greased and coated the side with sugar. It was a big mistake to buy that special springform cake pan, it leak! The cake batter created folds in the middle of the cake, and the side ended with sticky look because of the sugar! This cake texture was not good as the bottom layer was too dense. 

4th attempt:
I used 7" aluminium square tin, wrapped the baking tin with aluminium foil, the egg whites was beat until soft peak just before stiff peak, as the recipe has spelled out clearly to beat to soft peak or just about stiff peak (not stiff peak), Don't under beat the egg whites as this is crucial for a soft, light and cottony cheesecake texture. Or else your cheesecake will end with a dense texture. I baked with top and bottom heat, without fan mode. 

I baked this cake with oven temperature set as 140C. Baking time 1 hour 25 mins. The cake sit in the oven with oven door ajar for 45 mins after baking. It was a perfect cake with no crack and no fold or wrinkle on the cake top. After baking it shrank about 1 inch, still a pretty high cake with smooth top. However, the problem happened when I need to flip the cake out from the tin. The cake top stick on my flat plate, it peeled the beautiful top. 

5th attempt:
I used 8" aluminium square tin, wrapped the baking tin with aluminium foil, the egg whites was beat until soft peak just before the stiff peak, oven temperature set as 140C, baked with top and bottom heat, without fan mode, baking time 1 hour 30 mins. The cake sit in the oven with oven door ajar for 45 mins after baking. 

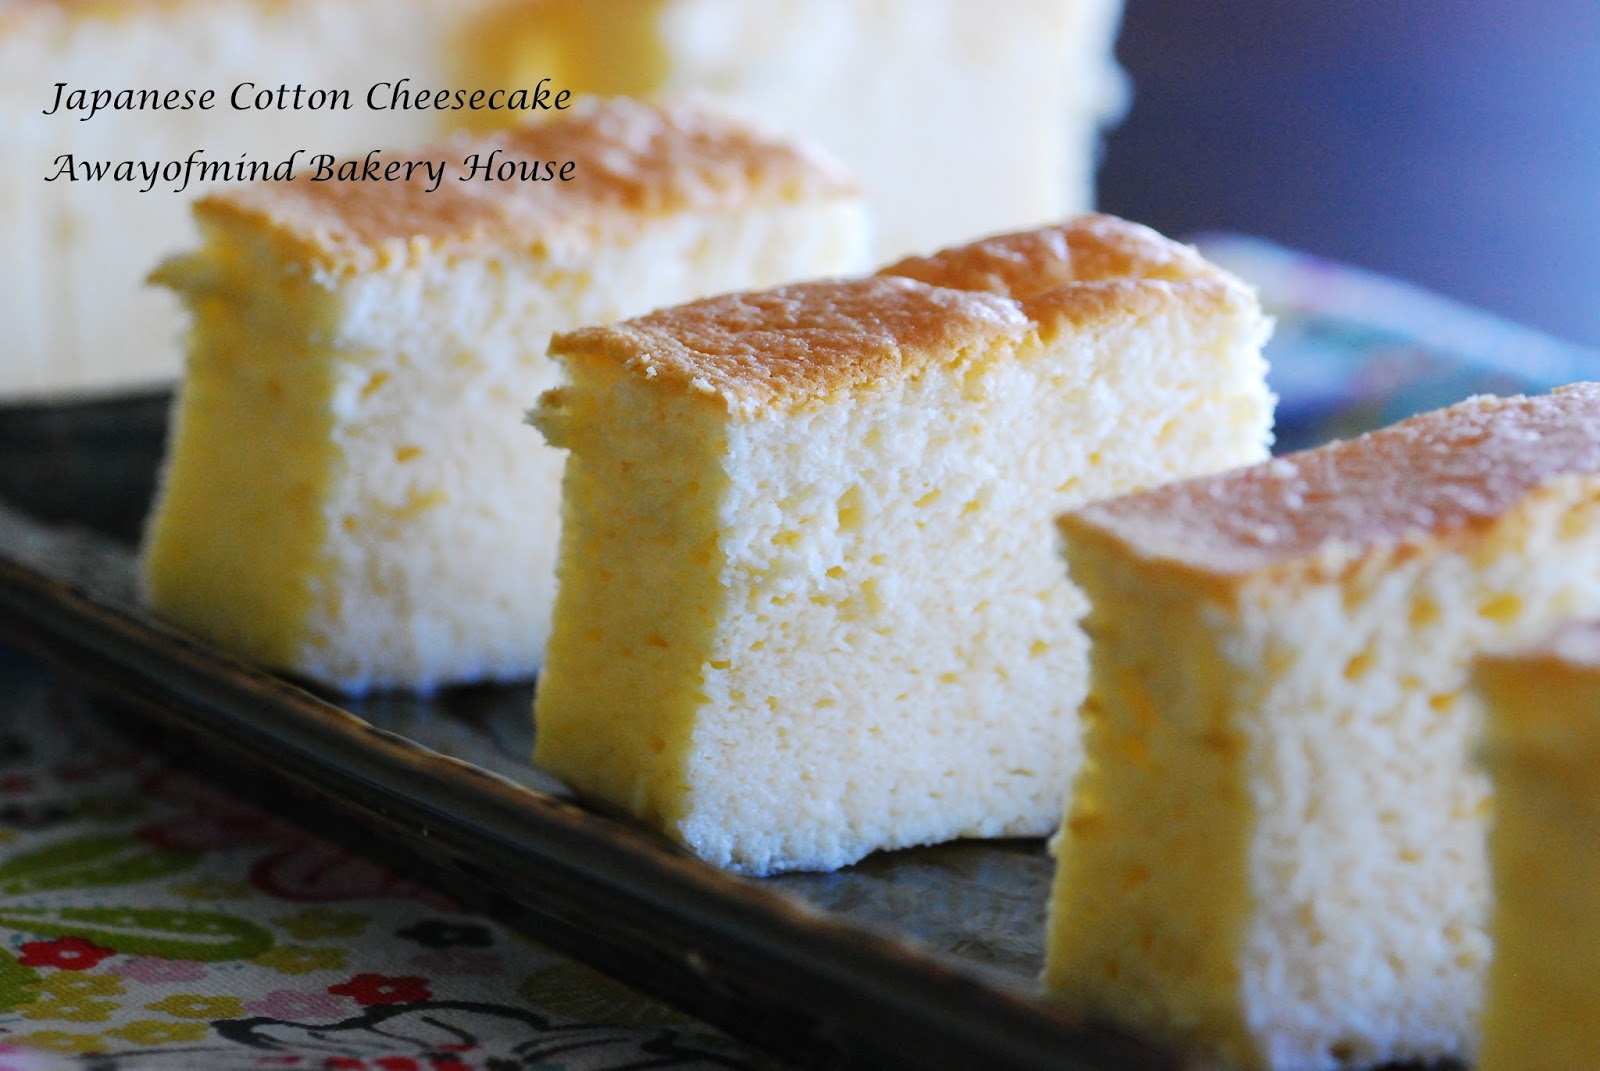
This cake ended with a bit folds in the middle of the cake top, I noticed there were bubbles coming out from the tin to the water bath during baking, not sure what really happened. The cake looks a bit over baked before cutting, but the cake texture is soft, light and cottony. 

So what have I learnt here for my future attempt?

1. An oven thermometer is a must for baking Japanese Cotton Cheesecake, you need to adjust the oven temperature if the oven is too hot. 140C is the oven temperature for me for this baking. If cracks happen on cake, you need to lower the temperature. However, bear in mind that if the oven temperature is too low, it will not be able to bake the cake probably, you will end up with very dense cake texture instead of the soft, light and cottony cream cheese texture.

2. Bake with top and bottom heat, without fan mode.

3. Use 7" tin if you prefer a tall cake.

4. One piece cake tin is good. As the tin needs to sit in the water bath. 

5. Egg whites has to beat until soft peak and just about to turn stiff peak. 

6. Water bath is using hot water.

7. Over bake a bit is ok and good for this cheesecake. Never under bake the cake, it will cause the cake to collapse and shrink very fast once you switch off the heat. 

8. last and most importantly....stick with the perfect cake pan!! oh my...I'm the mischievous one, always try out new baking tin! 

So after used up 1250g cream cheesecake, do I dare to take up this challenge again? The answer is a sure yes. 


4th attempt shrank a bit after cooling down, using 7 inch square pan


5th attempt, no crack on the top. However, I don't like the height of this cake, using 8 inch square pan. 


5th attempt


5th attempt


photos on 1st to 4th attempts

Ingredients:
egg yolks batter
250g cream cheese
6 egg yolks 
70g sugar
60g butter
100ml full cream milk
1 tbsp lemon juice
60g cake flour
20g corn flour
1/4 tsp salt
2 tsp vanilla extract

egg whites batter
6 egg whites
70g sugar

Method:
1. Prepare the baking tin: Grease the 8 inch aluminium square baking tin (7 inch if you prefer a taller cake), line the bottom of the tin with parchment paper. 

2. In a big bowl, melt the cream cheese, butter and sugar on a double boiler. Whip the mixture using a hand whisk until it is creamy and smooth. Remove from the double boiler, add egg yolks, continue to whisk the mixture. Add milk, vanilla extract, lemon juice. Gently add the sifted flour mixture (cake flour, corn flour and salt) Sieve the egg yolks mixture and set aside.

3. In a clean mixing bowl, using electric mixer, whisk the egg whites until it is foamy, add in the sugar in three batches. Beat the egg whites until soft peak just before the stiff peak. 

4. Take 1/3 of the egg whites mixture, mix it to the egg yolks mixture. Then fold in remaining egg whites mixture to the egg yolks mixture in two batches. Pour the batter into the baking tin, knock the baking tin on the worktop once to release air bubbles. 

5. Pour hot water on a bigger baking tray and let the 8 inch baking tin sit in the hot water. Bake the cake in a preheated oven (top and bottom heat, without fan mode) at 140C for 1 hour 30 mins, in the lower rack of the oven. Remember to place an oven thermometer in the oven to check the actual oven temperature, adjust the heat accordingly. 

6. After the cake is done, switch off the oven heat and let the cake sit in the oven with oven door ajar for 45 mins. Take out the cake from the oven and flip the cake out using a silicon mat to prevent the cake top stick and peel. (Thanks to a friend for the tip!) 

7. Cool down the cake completely before slicing.