29 January 2015

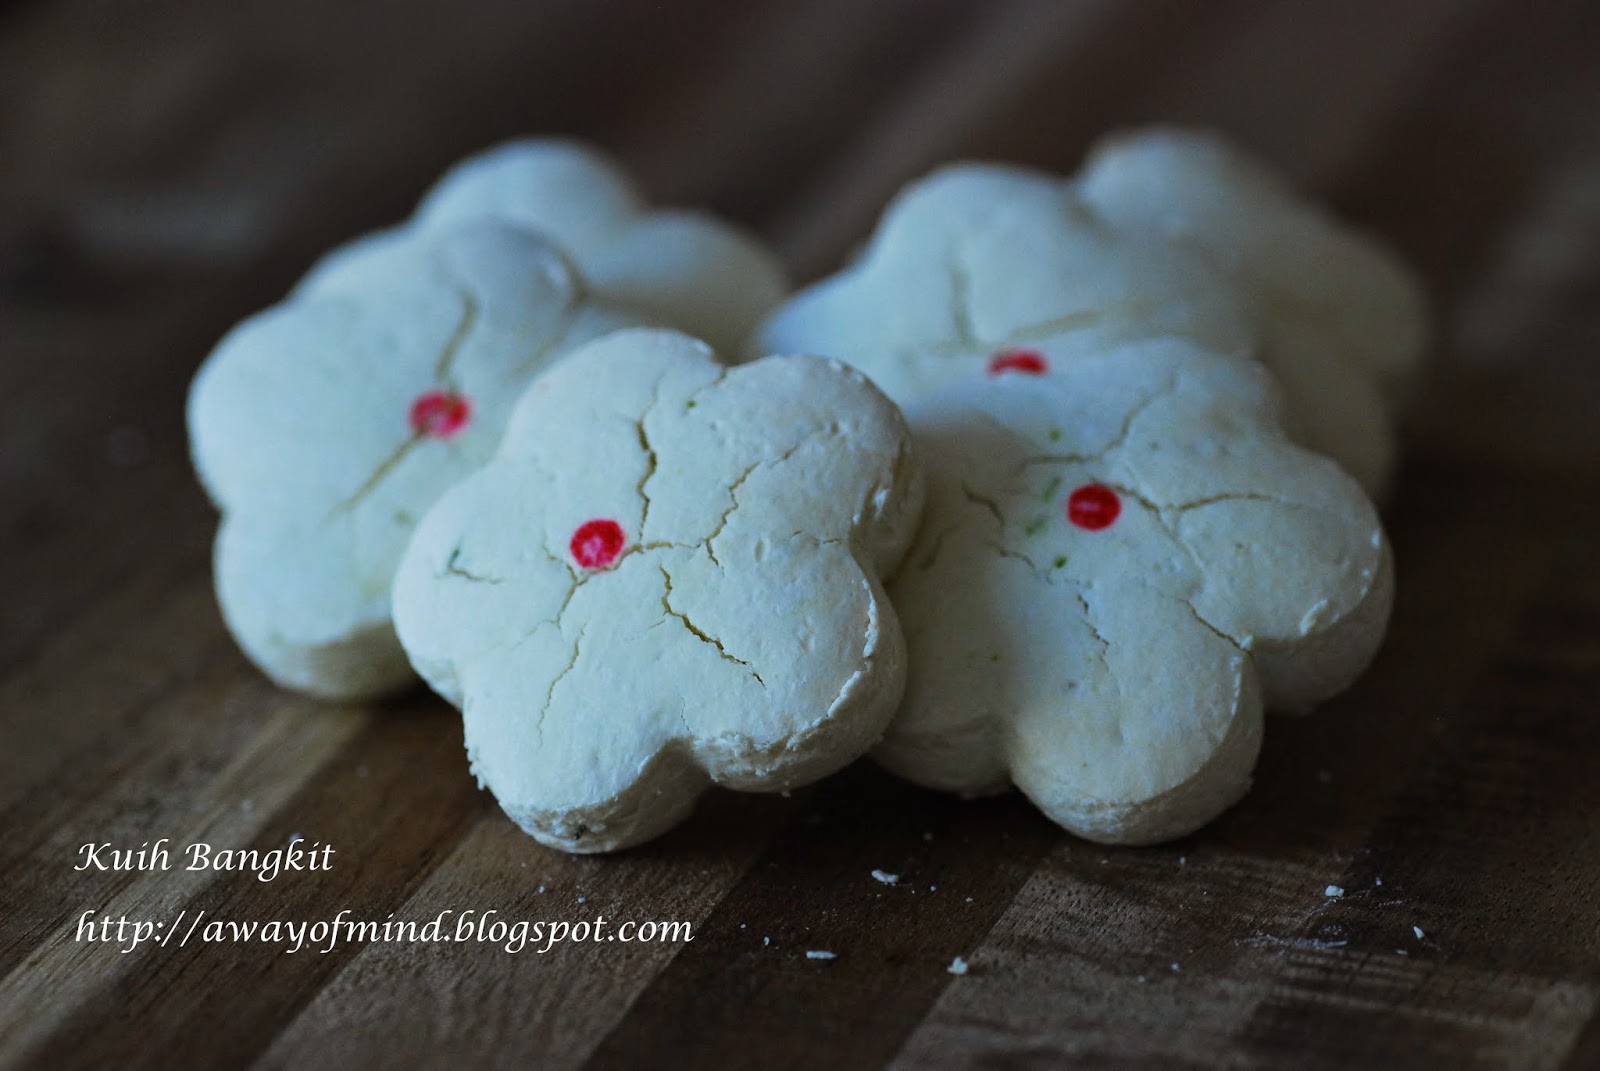
Kuih Bangkit(Tapioca Coconut Cookies 椰香番婆饼)


My first kuih bangkit was few years back and it was an unsuccessful attempt. For a while I didn't want to try baking it again thinking it will not be an easy baking. However, recently saw “BlueSky Food Post"sharing how to bake a successful kuih bangkit and they have record down the details, it looks simple but I know is a time consuming task. Anyway, I take on the challenge to bake the kuih bangkit and indeed with no regret!!

To ensure a successful kuih bangkit, a few important steps here you need to do really well. First, you have to fry the tapioca flour using a flat wok under low heat for at least 45 mins to an hour. Second, you have to use the hand whisk to whisk the egg yolks until it is pale and light, then add the icing sugar in batches and whisk until it is fluffy pale. These two steps are crucial to ensure a successful kuih bangkit.  Time consuming task but the end result is a rewarding melt-in-mouth kuih bangkit!! \(^o^)/


久未了番婆饼!好多年前曾尝试弄过番婆饼,那时弄的成品不成功。。。是好硬的番婆饼!后来一直都不敢再尝试。今年在网络上看到“蓝天白云美食专栏”很真诚的分享如何成功烘焙番婆饼,我的信心来了!

原来呀,要弄成功的番婆饼并不难只要注意几个关键部骤,那成品一定会是酥脆的椰香番婆饼!第一点,木暑粉得用慢火炒上45 分钟到一小时,第二点,蛋黄得用手拿打蛋器打至发白才逐渐加糖粉,再充分打发,这是成败的关键哟,一定要记得了!


Ingredients:
1kg tapioca flour, after frying is about 600g
10 pieces of pandan leaves, wash and dry with cloth, cut into 3 inch length
225g icing sugar
6 egg yolks
200g coconut milk
1/2 tsp salt
1 tbsp homemade pandan paste
red food colouring for decoration

Method:
1. In a flat wok, place 1kg of tapioca flour and pandan leaves in the wok, switch on low fire and fry the tapioca flour for 45 mins to an hour. After this process the tapioca flour is still white in colour and it will filled with pandan aroma. 
2. After the flour cool down completely, keep it together with the pandan leaves in an airtight container for at least a day. I kept them together for three days.
3. Sift the tapioca flour and discard the pandan leaves.
4. In a mixing bowl, hand whisk the egg yolks until it is pale, add icing sugar in 7 to 10 batches, 1 to 2 tbsp sugar in a time. In each adding, whisk the egg yolk mixture until fluffy pale. It took me about 30~40 mins. 
5. Add in the tapioca flour, salt, pandan paste and 1/3 of the coconut milk, mix the mixture with spatula and continue adding the remaining coconut milk if the dough is too dry. Use hand to knead the dough together. If too dry add some coconut milk. Knead the dough for 15 to 20 mins until it form a smooth dough. The dough should be soft, wet but not sticky.
6. Flatten the dough between two pieces of plastic cling.
7. Use the cookies cutter to cut the dough. Place the dough on a lined baking tray and bake at 135C for 30 mins.


28 January 2015

Crunchy Green Peas Cookies 香脆青豆饼


This is another type of cookies I baked recently, I bought the roasted green peas the type we used to have as tidbit, grind it into coarse green peas powder... it is really hard to make them into fine powder form! 

The end result is a crunchy green peas cookies my hubby loves, not sure is this because of recently consuming too much melt-in-mouth cookies? Lol! I actually love the unique fragrance and crunchy texture this green peas cookies has, beside that the saltiness is a change from the sweet cookies.  

Recipe referred to Anncoo Journal and Adeline Kitchen (on Facebook) with changes.


今年第一次尝试弄了青豆饼,我家阿老很喜欢,那香脆的咬感真的很棒。。。我想是不是因为近来吃多了入口即化的酥饼想吃点不同的?

这里没卖青豆粉,我买了烘过的咸青豆自己碾成粹粒,真的没法弄成粉。咸青豆本来的咬感是很棒的,弄成青豆饼口感真的很香脆!是会吃不停手的哟!


This cookies is simple to make, my Gabriel is able to help flatten the dough and use the cookies cutter to cut out the dough.


Ingredients:
360g green peas (snack type and grind)
200g icing sugar
540g plain flour
300g peanut oil
1 tsp salt

Glaze:
1 egg yolk with some water

Method:
1. Bring together all ingredients in a mixing bowl, mix it until it form a rough dough. The dough should be soft but not too sticky to hand. If the dough is too dry add more peanut oil, if it is too wet, dust with a bit of flour when you knead the dough.
2. Knead the dough a bit until it is smooth, cover and let it rest for 15 mins.
3. Flatten the dough between two sheet of plastic cling with a thickness of ~5mm.
4. Use the cookies cutter, cut the dough out. Place the cookies dough on the lined baking tray.
5. Glaze the cookies surface with egg yolk mixture. 
6. Bake at preheat oven at 170C for 15 mins or until the top of cookies is lightly brown.

27 January 2015

Nastar Pineapple Rolls 黄梨酥卷


Remember I talked about the recipe used for Nastar Pineapple Rolls? Two days ago, I feel that I was ready to take up the time consuming task, so I go on to make the Nastar Pineapple Rolls with my small nastar pipping nozzle. The ingredient I changed here is instead of custard powder I added corn flour. 

Well the end result is not so obvious from the Nastar Pineapple Rolls, but the end result is so obvious if you roll the pineapple tarts into balls! See that?! With corn flour it produced smooth surface pineapple tarts but if you used custard powder which I did on my previous baking the surface is not so smooth. If you ask me which one I prefer, I will say is the one using corn flour because it actually produced a more crumble texture compared to the pineapple tarts which used the custard powder. So if the ingredient call for corn flour or custard powder, watch out! They are not actually equal if come to end result. 

Ahh... the photos on Nastar Pineapple Rolls are before I place them into oven, no after baked photos on Nastar Pineapple Rolls because ... I actually over baked them and they really looks burnt!! (>﹏<)

Note:
1. For my oven, if baking Nastar pineapple Rolls need a lower temperature than the usual ball shape pineapple tarts.


Ingredients for pastry: 
454g butter, soften 
120g icing sugar
4 egg yolks
4.5 tbsp ghee
1 tsp vanilla extract
1/2 tsp salt
630g plain flour
70g corn flour
1 tsp baking powder

Method:
1. Cream butter, ghee and sugar until light. Beat in egg yolks, one at a time. Add vanilla extract and salt. Beat until fluffy. 
2. Fold in sifted flour ingredients and mix into a firm dough. Put dough on a work surface and lightly knead until the dough is smooth.
3. Wrap with plastic cling and place in the fridge for 30 mins. Let the dough rest and bind.
4. Roll the pineapple jam into small balls.
5. Remove dough from fridge, divide dough using a teaspoon and roll into balls. 
6. Flatten a piece of dough and place a piece of the roll pineapple jam in the middle. Bring the edges of the dough together and press lightly to seal. Roll it in between your palms to shape it into a ball. 
7. Place the pineapple dough on baking tray lined with parchment paper. 
8. In a small bowl, mix the egg yolk and water together for the glaze. 
9. Brush the glaze on the pineapple rolls with a brush. 
10. Bake in preheated over of 180C and bake for ~20 mins or until it turned golden brown. 

11. Cool on wired rack before store in airtight container.

25 January 2015

Yogurt Banana Bread 香蕉优格面包


This yogurt banana bread was made last November. I referred to Carol's carrot toast with changes because I didn't want to use carrot and I didn't have original flavour yogurt at the point of baking. I added mashed banana and strawberry yogurt into the bread, and changes the quantity of bread flour accordingly. The end result was a lovely soft bread texture with light fruity taste, I didn't add extra sugar into the bread, the sugar content in the mashed banana and strawberry yogurt is sufficient. 


在我平淡无烦恼的日子中,最怕的冲击是接到学校的通知告诉我孩子在学校发生的事情。那颗忧虏的心。。。好久都没法回复平静。我祷求那万能的主派他的守护神一直保守在你身边。

好久没弄面包了,这是去年十一月的作品。食谱参考了Carol的红罗卜吐司。我没用红罗卜也没有原味优格,当时是在面包里加了香蕉和草莓优格, 面粉也做了调整,成品是果香的软面包,这面包不必再另加糖,香蕉和草莓优格的糖分以很足够


Ingredients:
150g mashed banana
280g~310g bread flour (I added 280g first, gradually add more flour during the stage of kneading the dough, stop when you get the right dough texture)
1/2 tsp dried instant yeast
1/8 tsp salt
30g unsalted butter, soften and cut into cubes
60g strawberry yogurt

Method:
1. Place all ingredients into the mixing bowl (except the butter), mix it with KitchenAid (speed 1) for a while then change to medium speed 4. When the dough come together and form rough dough, gradually add in the butter cubes, let the KitchenAid knead the dough until smooth and form elastic film. 
2. Let the dough form a ball, sprinkle with some water on the dough, cover and proof until the dough double it size. 
3. Flour the work surface with bread flour, punch out the air in the dough, divide the dough into two and let it rest for 15 mins.
4. Flatten the dough into long shape, roll up swiss roll style, flatten the dough again into long shape and gently roll up swiss roll style. (repeat it on the second dough)
5. Place the bread dough into the greased toast tin, place them close to each other. Sprinkle with some water, and close the toast tin, let the dough proof for the second time for around 60 mins or until it is 90% reaching the edge of the toast tin.
6. Preheat the oven to 210C bake the bread with lid on for 35mins. Cool completely before slice the bread.

Note:
1. The time and temperature of baking depends on the capacity of your oven. 
2. Depends on the flour you used, if the dough texture is too dry, you may need to add a bit milk or water. If the dough texture is too wet, you may need to add more flour.

22 January 2015

Char Koay Kak (Fried Radish Cake) 怀旧炒罗卜糕


Penang is famous for its street hawker food. This dish I posted here is one of the famous street food in Penang, it is made of shredded radish, we called it Char Koay Kak (in Hokkian) which means fried radish cake. Penang's version of fried radish cake is similar to the Singapore's version of fried radish cake, the main difference is Penang's Char Koay Kak is at salty side, the dish is dark in colour and the radish cake has to be in cubes. 

Few days ago, I made this dish to bring to the Asian Coffee Morning (ACM) as the theme for the morning was "Childhood Nostalgia". Yes, I have so much sentimental feeling for this dish because it actually captured the happy childhood I had when I was still in primary school. The image of the huge flat base wok, the uncle who fried the radish cake, the rundown three wheels hawker cart, the navy blue uniform, the days when we know nothing about worries, the yellow school bus that always broke down.... were all part of my childhood.

I'm glad that the ladies from different culture background was able to appreciate this Penang Char Koay Kak (Fried Radish Cake). The texture of the radish cake has to be firm but soft, the right texture will allow you to fry the radish cake blissfully and not turn into mess. 

Recipe referred to my previous post , original from Minty's Kitchen

槟城。。。街边小吃的天堂!今天上的这道小吃是槟城炒罗卜糕,卖相是和新加坡的炒罗卜糕很相像但最大的不同是槟城炒罗卜糕是咸和黑的。想当年每一天下了课肚子饿的我最期待的一件事是吃上一包用橡蕉叶报纸包成锥形热腾腾的炒罗卜糕。那时一包炒罗卜糕才RM0.20。

那大平锅,那校门外炒罗卜糕阿叔的背影,那老旧的三轮小贩车,那穿深蓝裙子的日子,那嘻哈无忧的我们,还有那黄色时常抛锚的学生车是那么的让人怀恋。

前几天就带了这道槟城炒罗卜糕赴一个“怀旧情怀”之约,来参加的人都是来自各亚洲的女士,很高兴有不同文化背景的朋友懂得欣赏这道槟城街边小吃。我想怀旧之情是会被感染的!


yield: 8~10 plates
Ingredients for making radish cake:
600g radish (shredded)
440g rice flour
80g tapioca flour
40g wheat starch
500ml water
2 tsp salt
2 tbsp sugar (to taste and add to cover the smell of rice flour)
1000ml water (add during frying stage)

Method:
Making radish cake:
1. In a mixing bowl, combine rice flour, tapioca flour, wheat starch and 500ml water together, stir well.
2. In a pot cook shredded radish with water till soft (turn translucent). Discard water.
3. Heat pan with 1 tbsp oil, fried the shredded radish for 2 mins. pour 1000ml water into the pan.
4. Continue cook the shredded radish mixture till boiling, stir in flour mixture and cook over low heat all the time until the mixture thicken.
5. Pour the batter into a steaming pan. Steam over boiling water for 30 mins. or the radish cake turned slightly translucent. Cool the radish cake thoroughly before cutting into cubes. I keep mine in a wrap aluminium foil overnight in fridge before cutting it the next day.

Ingredients for frying the radish cake:
6 tbsp chopped sweet pickled radish (chai poh), soak in water for 30 mins. and drain
1 bulb garlic, minced
2~3 eggs (optional)
some Chinese chives
some bean sprouts
3~4 tbsp cooking oil
seasoning (to taste):
1 tbsp dark soy sauce, 
1 tbsp sweet dark soy sauce (kicap manis)
2 tbsp light soy sauce (to taste)
1 tbsp red chili paste (sambal chili)
1 tbsp sugar

Frying radish cake:
1. Heat oil in flat base wok and fry minced garlic and sweet pickled radish till aromatic.
2. Add in radish cubes and fry with medium heat until the radish cake turn lightly browned and slightly crisp. 
3. Add in seasoning, red chili paste and fry to coat evenly.
4. Push the radish cubes to the side of the pan then crack eggs into the pan. Allow the eggs to set slightly before flipping the radish cubes over.
5. Finally add bean sprouts and Chinese chives. Toss until well combined.

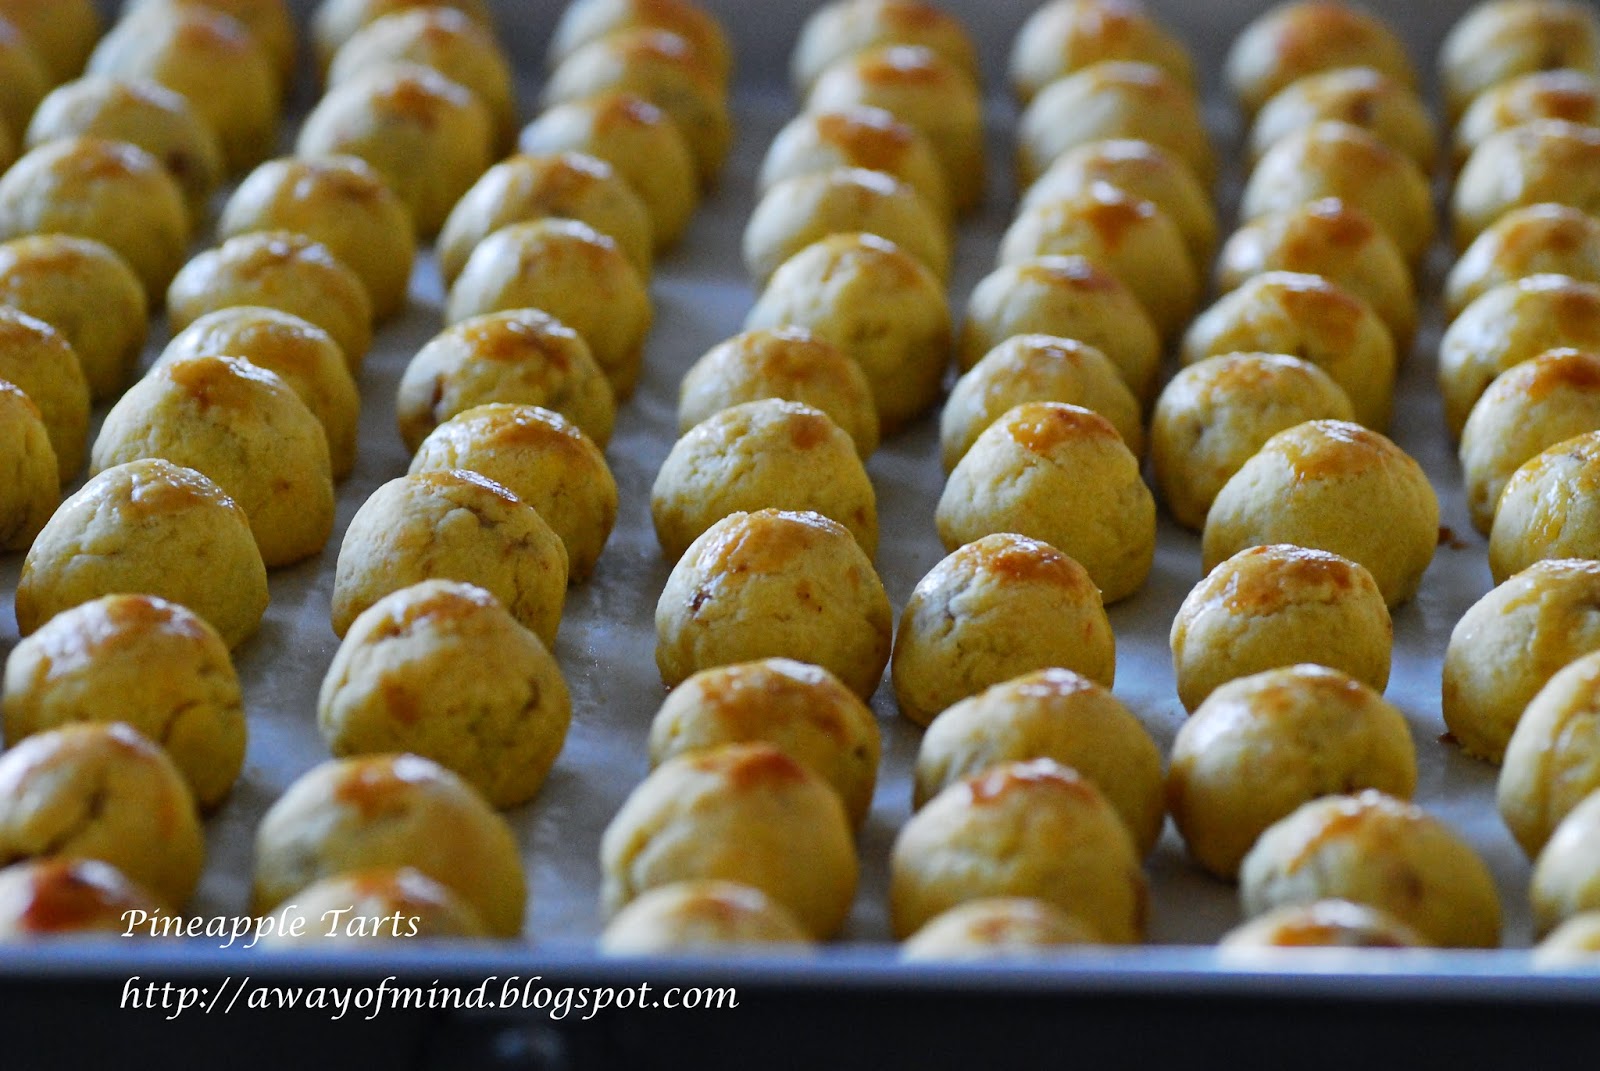
Pineapple Tarts 2015(Enclosed version) 黄梨酥


This year I made the pineapple tarts with homemade pineapple filling, I have tried out a new pastry recipe instead of using the previous year one, in last year pastry the ingredient was without butter. I must say the pineapple tarts which has the butter in it is scrumptious! The instantly melt-in-mouth crumble pastry and linger on your tongue sweet and sour pineapple-lemon make you want to have more of the pineapple tarts, one is not enough! 

The Golden Churn Pure Creamery Butter was a gift by a friend, thank you! Love the creamery of the butter!! I used up the 454g butter in one go and changes the quantities for the rest of the ingredients accordingly. 

Pastry recipe referred to To Food with Love, with changes. Initially I want to do Nastar pineapple but the mould I have is really small and couldn't pipe out the dough smoothly, I gave up and do the easy round shaping. ^^ 

Note:
1. Make sure you preheat the oven to the require temperature before place the baking tray with pineapple tarts into the oven. 
2. Adjust the temperature according to your oven capacity. Bake a few pieces as test bake on your oven temperature. 

今年的黄梨酥和去年一样都是用自己煮的黄梨馅,饼皮却尝试了不同的食谱。去年的饼皮材
料里只用酥油没用黄油。今年用的食谱里有黄油和酥油。。。我想说:有黄油的黄梨酥真的好香!酥饼融化在嘴里及尝到微甜和柠檬酸的黄梨馅。。。一粒接一粒停不下嘴来。得谢谢给我那罐Golden Churn Pure Creamery Butter的朋友,这牌子的黄油真的太棒啦!!


Ready for oven!!


Ingredients for pineapple filling: 
1.5kg of pineapple puree (Blend the cut pineapple, no separation of pineapple juice with fibre)
2 tbsp of ground cinnamon
1 medium size lemon (Blend the lemon together with skin)
250g fine sugar (to taste, as some pineapple is very sweet and some may be a bit sour)

Method:
1. It is best if you have a big wok because the juice in the pineapple can dried off easily. Mix the pineapple puree with lemon puree and add ground cinnamon. 
2. Cook the pineapple-lemon puree on high heat until it is boiling, continue to cook for 30 mins before turning the heat to medium low. Add sugar and continue the cooking for another 75 mins or until the juice dried off and the pineapple jam turning stiff. Remember to stir the pineapple jam once in a while to prevent burning at the bottom. 
3. Cool down complete before keep in fridge for a day.
4. Roll into small balls, set aside for later use.

Note:
1. the cooking time may vary (mine is about 1 hour 45 mins) as it is depends on the size of your wok and the juice contains in the pineapple.
2. The pineapple jam is not mean for spreading so the texture is a bit stiff so it is able to roll into a ball for the enclosed pineapple tarts. 

Ingredients for pastry: 
454g butter, soften 
120g icing sugar
4 egg yolks
4.5 tbsp ghee
1 tsp vanilla extract
1/2 tsp salt
630g plain flour
70g custard powder
1 tsp baking powder

Method:
1. Cream butter, ghee and sugar until light. Beat in egg yolks, one at a time. Add vanilla extract and salt. Beat until fluffy. 
2. Fold in sifted flour ingredients and mix into a firm dough. Put dough on a work surface and lightly knead until the dough is smooth.
3. Wrap with plastic cling and place in the fridge for 30 mins. Let the dough rest and bind.
4. Roll the pineapple jam into small balls.
5. Remove dough from fridge, divide dough using a teaspoon and roll into balls. 

6. Flatten a piece of dough and place a piece of the roll pineapple jam in the middle. Bring the edges of the dough together and press lightly to seal. Roll it in between your palms to shape it into a ball. 

7. Place the pineapple dough on baking tray lined with parchment paper. 

8. In a small bowl, mix the egg yolk and water together for the glaze. 

9. Brush the glaze on the pineapple rolls with a brush. 

10. Bake in preheated over of 180C and bake for ~20 mins or until it turned golden brown. 
11. Cool on wired rack before store in airtight container.

15 January 2015

Homemade Nian Gao (Chinese New Year Steamed Sticky Cake 传统年糕)


This year my priority is to make Chinese New Year Steamed Sticky Cake, this tin moulds has been with me for almost three years. When my mum pass it into my hands, she told me that all the baking tools that my late grandma used has been stolen and this five tin moulds is the only thing left behind. Today then I realize and witness how good this tin mould is. But my skill on lining the banana leaves into the tin mould is awful!! 

My Nian Gao recipe referred to Sonia and Honey Bee Sweets recipe with minor changes. I want to make 5 sticky cakes so I increased the flour and water to 800g. I used 500g brown sugar and 100g caster sugar. With 3 hours of steaming the light brown batter turned into shining dark brown. 

Just after I finished snapping the food photos, my son and I finished up one sticky cake within 10 mins!!! Lovely cake texture to glue up our mouth!! ...Haha this is the story my grandma told us when we were young, the Kitchen's god will go back to Heaven just before Chinese New Year and he is going to report whatever good and bad things happened in the house, so the people make this type of sticky cake for the Kitchen's god so to glue up his mouth and he said nothing about the people in the house! A legend we pass down from one generation to another young generation...this year may be I should tell a different story to Gabriel.

今年最想弄的就是年糕,三年前老妈把阿麻弄年糕的锡模子交给我时对我说“阿麻放在老家弄糕点的模子工具都被人偷走了,只剩这五个弄年糕的锡模子,就给你。” 当时的我还犹豫了好一阵子。今天终於明白和见证了这经得起时间考验,锡模子的功力。

过年过节我阿麻是最怕我们这些孩子进厨房捣蛋的,她蒸年糕的炉子和工具在当时我的眼中像山那么高,一次就蒸上二十多粒的年糕。我用着她的锡模子感慨万千,今天至少给这五个模子回复一点皆日的风采。


yield 5 sticky cakes
Ingredients: 
800g glutinous rice flour
800ml water
600g sugar (500g brown sugar and 100g caster sugar)
5 tbsp cooking oil
banana leaves, soften it by blanched in hot water


Method:
1. Line the banana leaves on the steaming mould, use a string to tie the banana leaves on to the mould so it is in place.
2. Place the glutinous rice flour in a large bowl, mix in 500g brown sugar, oil and water, stir the mixture till the sugar dissolved.
3. In another small pot, cook the 100g caster sugar on low heat until it becomes golden syrup.
4. Pour golden syrup into flour mixture, continue to stir the mixture until the syrup dissolved.
5. Strain the mixture and pour the mixture into the steaming mould.
6. Steam the cake over high flame for 1 hour, and turn the heat to medium low, continue steaming for another 2 hours or until the cake turned into dark brown. Make sure the water in the steamer is not dry up.

14 January 2015

Quail Eggs With Mushrooms 安鹑蛋扒蘑菇


近几天早晨的气温都在14~15C,天空是阴寒的一致有快要下雨的感觉,开始怀恋温柔的阳光。这早晨让我依恋我的被褥,不想甦醒。

安鹑蛋是我家孩子喜欢的,今天就为他弄了一道新菜肴,这是老小都会喜欢的。

Winter is indeed here! These few days I woke up to a freezing cold air, the temperature in the morning is usually between 14~15C. The cold air make me miss the warm sunshine. Oh...the bright sunshine! This is the best time to sleep in, I have no choice but to wake up and prepare the day. 

Quail eggs is one of my son favourite, today using a new way to cook his favourite quail eggs hopefully he will enjoy eating it as I do. 

13 January 2015

Agedashi Tofu 2015 揚げ出し豆腐


今天为正在长恒牙的孩子弄了一道简单豆腐菜肴,炸好的豆腐是内软外酥的,配上酱料味道还满可口的,这么软的食物今晚他应该可以吃得快一些吧?

Making Agedashi Tofu for my son again, this dish is easy to prepare, what you need is a block of silken tofu, corn flour and some tapioca flour. Of course if you have some bonito flakes on top of the tofu will be a bonus to this dish. The tofu is having a soft crust with soft inner, it is delicious to serve warm with its dipping sauce. 

08 January 2015

Tofu with Minced Pork Balls 鲜肉豆腐丸


Gabriel told me he has another shaky front teeth, he said he can't chew food, he claimed he is a vegetarian but the problem here is he also can't eat the green vegetable...another big challenge for me to make a new dish for him! 

Today dig out a pack of Japanese tofu crumbs from my pantry, with a box of medium firm block tofu and a pack of minced pork I made this new dish Tofu with Minced Pork Balls for him. He finished 8 meat balls in a meal!!! I wonder is this because he is a picky eater or I have problem with my cooking! Lol!  

This meat ball is soft and fluffy, not the bouncy firm texture. With the fluffy tofu in the minced meat, it created a unique combination of flavor. 

近来我家小孩好像又要长恒牙了,他说不能咬嚼食物。。。他说他是不吃肉的素食者!!那不吃肉的素食者连菜也吞不下。今天只好想办法弄了一道鲜肉豆腐丸,那自说不吃肉的孩子竟一餐吃下八粒鲜肉豆腐丸,我看了只有在心里偷笑!

05 January 2015

Kueh Kodok (Deep Fried Banana Balls 炸香蕉丸)


Finally squeeze out some time to try a new recipe, this deep fried banana balls (kueh kodok or Jemput Jemput Pisang) is a traditional nyonya kueh. If you are tired of using your left over banana for banana cake, this kueh kodok is a good option. I have modified a bit from the original recipe because I just have 400g of banana and I added one teaspoon of rice flour into the batter. The end result is lovely, I like its a bit crisp crust with sweet soft inner. No water added to the batter, just use the mash ripe banana to combine well with the flour, I let my batter rest for 15 mins before deep fried! 

Recipe refer to The Nyonya Love cookbook by Ricky Ng with changes.

今天趁儿子上课,弄了一道很棒的娘惹糕点。如你吃腻了香蕉蛋糕,那把剩余的香蕉弄这道炸香蕉丸是很好的选择。我把原食谱变动了因为我只有400克的香蕉,也加了一茶匙的粘米粉。成品是内软外脆的,我家人都很喜欢。记得这道糕点是不加水的,那炸出来的糕点型状才会包满。


Ingredients:
170g plain flour
1/2 tsp baking powder
a pinch of salt
1 tsp rice flour
400g ripe banana (peeled and mashed)
80g sugar (optional as depends on the sweetness from the banana you use)


Method:
1. In a bowl, mash the ripe banana and combine well with the rest of the ingredients.
2. Let the batter rest for 15 mins.
3. Use an ice-cream scoop, scoop a spoonful of batter and deep fry in a medium hot oil till golden brown. Use a chopstick to keep pressing and turning the banana ball while you are frying, this will help the banana ball to puff up nicely. Place the banana balls on a kitchen tissue to drain away oil before serve.