31 July 2017

Char Siu Bread Buns 叉烧面包 (Chinese BBQ Pork Buns) (65C Tangzhong Method)


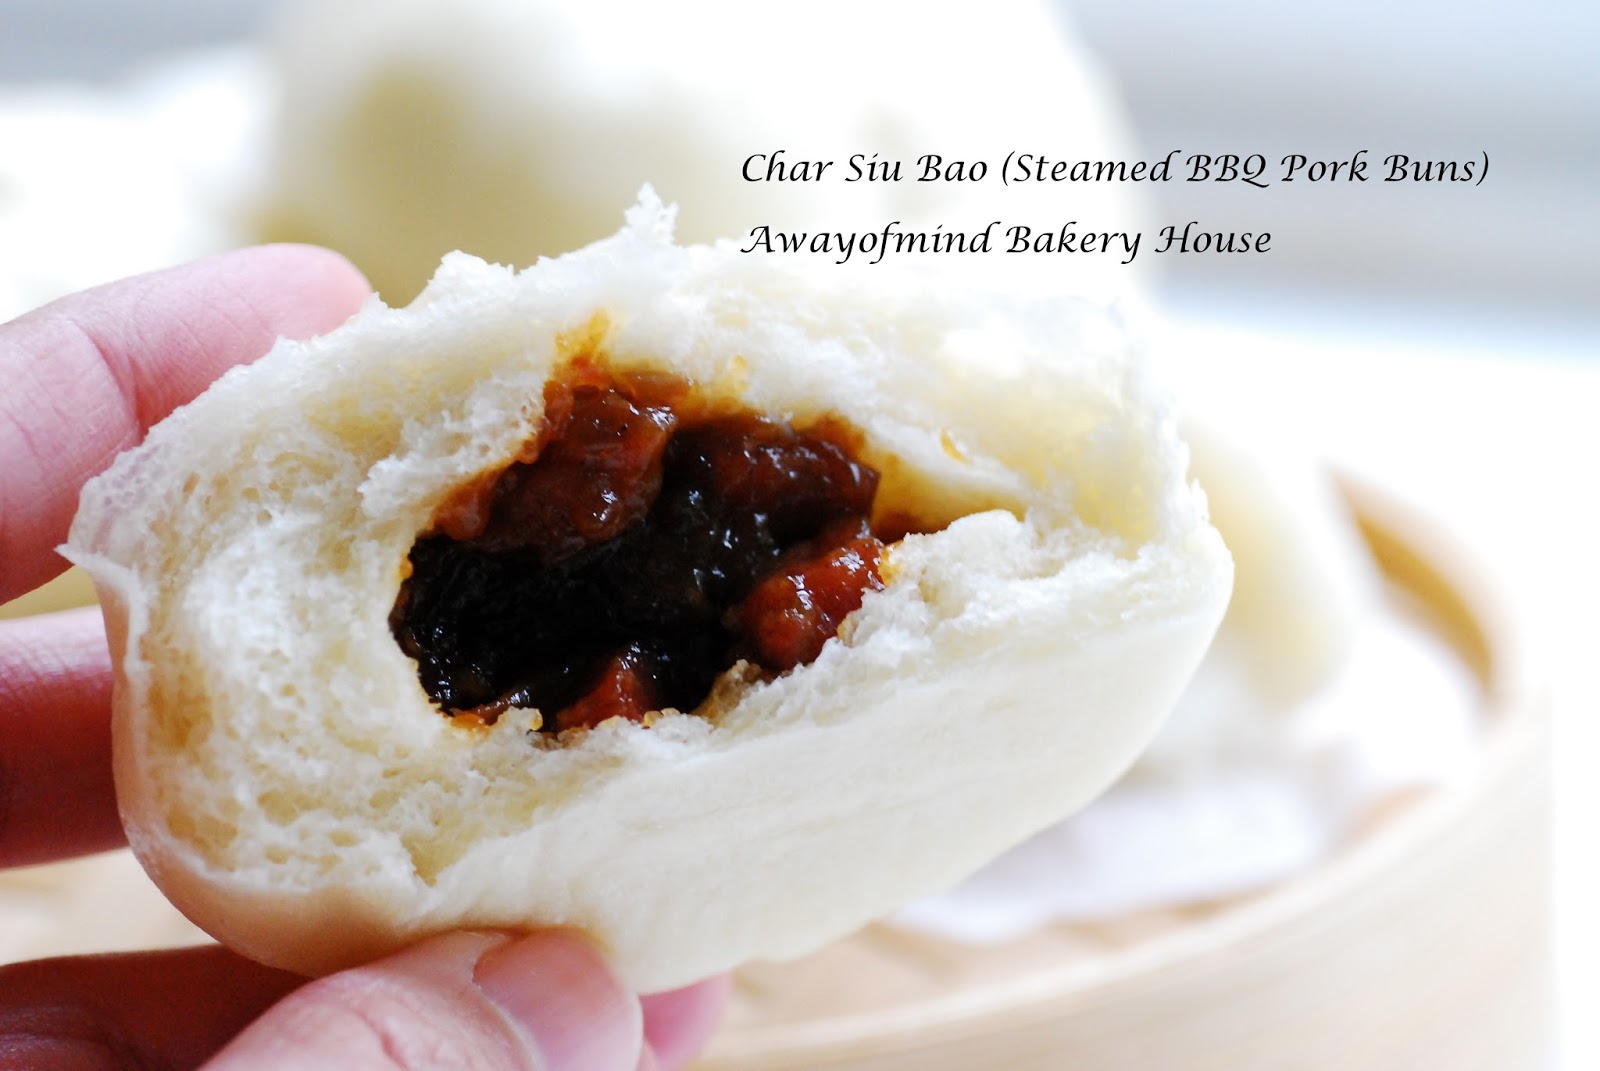
Char Siu Bread Buns or Chinese BBQ Pork Buns is my son latest favourite breakfast (of course he has many type of favourite breads because his mum love to make breads ^^) I used the leftover Char Siu Bao filling to make this baked buns. 

The bread texture is super soft, I'm using golden syrup and water roux starter in this bread making. I like both steamed and baked Char Siu Buns. How about you? 

This recipe yield: 16 buns


Ingredients:

Tangzhong/ water roux starter:

30g bread flour
150ml water

bread dough:
500g bread flour 
55g pastry flour (top flour)
30g milk powder
5g instant dry yeast
60g fine sugar
1/2 tsp salt
~110g Tangzhong
160 ml water (add gradually)
20g golden syrup
60g butter, chop in small pieces


Filling:
180 g BBQ Pork filling (Char Siu filling)

Egg wash:
one egg yolk with 2 tablespoons of milk, mix well

Method:
1. Prepare Tangzhong: Mix together ingredients in Tangzhong, cook under medium heat, keep stirring until the mixture thicken, not boiling. Remove from heat, cover and set aside until cool.

2. Prepare filling: Please refer to Steamed BBQ Pork Buns (Char Siu Bao)

3. Prepare bread dough: In the electric mixing bowl, add all bread dough ingredients except water and butter. Gradually add water (set aside 50ml for slowly add in) and mix with KitchenAid speed 2 for a min before change to speed 4. Slowly add more water. 
4. When the mixture form rough dough or able to pull away from the mixing bowl, add in butter. Continue to let KitchenAid knead the bread dough until elastic windowpane. It means the bread dough is able to stretch open on your palm without tearing. 
5. Cover the dough and let it proof to double its size. Punch out the air in the bread dough, divide the dough into 16 equal portions. Shape the dough into round balls. Let it rest for 10 mins.
6. Flatten the dough into circle with middle part a bit thicker than the edge. Place a heap teaspoon of BBQ pork filling in the middle. Wrap up the edge of the dough, shape the dough into round ball. Place the dough on the baking tray, let it proof until double its size.
7. Egg wash the dough. Use a sharp razor, gently slice a few slices on the top of the bread. 
8. Bake in a preheat oven at 180C for 15 mins. or until the top of the bread turned slightly brown. 

28 July 2017

Char Siu Bao (Steamed BBQ Pork Buns) 叉烧包


Char Siu Bao is the Chinese Steamed BBQ Pork Buns which you can easily find at any Chinese Restaurant especially the one selling Dim Sum or Yum Cha. The size of the Char Siu Bao can be varies, some restaurants make the Char Siu Bao in dedicate bite size, however, some prefer it to be half our palm size. To me, I love Char Siu Baos because of its filling, the sweet, sticky with a faint fragrance of oyster sauce, the taste just make you want to continue eat more of it. 

I can't find Hong Kong flour over here and I'm using Lighthouse self-raising flour for steamed buns. The baos came out a bit yellowish and not totally white in colour like the one selling. To cut short the cooking time, I bought the real deal tender and juicy Char Siu instead of homemade. 

This recipe yield 21 buns. (I have extra filling for another bread making)


Ingredients:
BBQ pork filling (The filling is able to make 40 buns):
500 g diced Char Siu (BBQ Pork)
1 small brown onion, diced
1 tablespoon sesame oil
2 tablespoons sugar
3 tablespoons Chinese cooking wine
4 tablespoons oyster sauce
2 tablespoons dark soy sauce
3 tablespoon tapioca flour
1 tablespoon light soy sauce 
1/2 tablespoon cooking oil
500 ml water

Bao Dough:
400 g self-raising flour for steamed bun
8 g instant yeast
160 ml warm water
30 g vegetable oil
60 g sugar
10 ml cold water
2 teaspoons baking powder

Method:
Prepare the BBQ filling:

1. Heat up a cooking pan with cooking oil, add diced onion. Stir fried the onion until it is soft. Add the diced char siu, pour in the water. Add sesame oil, sugar, oyster sauce, light soy sauce and dark soy sauce. When the water is boiling, turn the heat to medium, add the Chinese cooking wine, let it continue simmer for a while. Taste the char siu, if you prefer it to be sweeter, add more sugar. (The Char Siu filling should be strong in flavour so it can fusion well with the plain bao texture) 
2. In a small bowl, add tapioca flour and mix well with 2~3 tablespoons of water, mix well. Pour the tapioca mixture into the cooking pan. Let the Char Siu gravy thicken. Remove the pan from the heat. Set aside to cool before store in the fridge for at least 2 hours (I let the filling sit overnight in fridge)

Prepare the bao dough:
1. In the mixing bowl, add self raising flour, instant yeast, warm water, and sugar. Using KitchenAid, speed 1 mix the flour mixture together to form rough dough. Add in vegetable oil, continue to knead in speed 2 until the dough is smooth.
2. Cover the dough and let it proof until double its size.
3. In a small bowl, add baking powder and the cold water. Mix well. Set aside.
4. When the bao dough is ready, punch down the air. Mix the dough with baking powder mixture, knead well. Let it rest for 15 mins.
5. Divide the dough into the desire portion, for my case 21 portions. Shape the dough into round balls, rest for 10 mins.
6. Flatten the dough, wrap in a heap teaspoon of filling, wrap up and seal the dough. Place a piece of baking paper below each bao dough.
7. Arrange the bao dough in a pre-heat off heat bamboo steamer (or any type of steamer you have). Let it proof for 15 mins. 
8. Switch on the heat, steam the bao for 10 mins. Off the heat, let the bao sit inside the off heat steamer for 5 mins before taking them out. Serve warm. 

27 July 2017

Kopitiam Milk Buns / Plain Milk Buns (Overnight Sponge Dough Method)


Kopitiam Milk Buns is the plain milk buns that always selling at coffee shop when we were young. It doesn't has any distinctive taste, so the usual ways of eating it is by dipping the bun into the coffee, milo, soft boil egg, or go with kaya and butter. This bun was very popular among bloggers two years back. I always not able to keep up with the current popular bakes.

I tried with two recipes this round, one with overnight sponge dough and the other one with straight dough method. Both gave me soft bread on the day of bake, however, the bread was not soft to touch on the second day and I have to heat them up in the microwave for 20 seconds to get the soft bread. I'm not sure could it be the butter used was way too little for the straight dough and was it the overnight sponge dough I used way too dry? 

I referred the recipe from My Little Favourite DIY (overnight Sponge Dough Method). This recipe yield 9 buns.


Ingredients:
Overnight Sponge Dough:
215 g bread flour
125 g cold milk
1/2 teaspoon instant yeast

Milk buns Dough:
the overnight sponge dough
90 g bread flour
30 g egg
1/2 teaspoon instant yeast
1/2 teaspoon salt
60 g sugar
45 g room temperature soft butter
1 tablespoon cold milk (I used 3 tablespoon of cold milk)

Method:
Prepare the overnight sponge dough: 
1. Add all ingredients in a mixing bowl, combine to form a rough dough, do not need to knead until windowpane. Cover with cling film and immediately store in the fridge for overnight (at least 12 hours)

Prepare the bun dough:
1. Tear the overnight sponge dough into pieces and add all ingredients except butter into the mixing bowl, using KitchenAid speed 1, combine together and change to speed 2, knead until smooth dough.
2. Add in butter and knead until elastic windowpane. Cover with cling wrap and let it proof until double its size.
3. Punch down the dough, flatten it and divide into nine equal portions. Shape the dough to round balls. Place them in a line square pan and let it proof  to double its size.
4. Bake at pre-heated oven at 180C for 15 mins.


13 July 2017

Creamy Custard Bread 卡士达面包 (65C Tangzhong Method)


Creamy Custard Bread/Custard Bun some name it as Milk Pudding Bread. It is my favourite, when I happen to drop by a bakery I always look for custard bread or bun. A perfect Creamy Custard Bread to me is having a soft bread texture with creamy pastry cream in it. I know there are many different varieties for the filling but I love the pastry cream filling which is without the use of condensed milk. The filling which is build up purely using egg yolks, milk, sugar and pastry flour.

I bet my son and hubby will be thrilled to see these creamy custard bread later. I'm using water roux (Tangzhong 汤种) starter in the bread dough again, as this will produce a soft bread texture. I would suggest to prepare pastry cream a day in advance of the bread making as the pastry cream needs time to  settle and firm up, this will make wrapping the filling process a breeze. 

I have to bake this custard bread as all the 12 pieces of Pork Floss Buns finished in just two days! The recipe yield: 12 buns

漂亮鬆软的面包,简单素质的生活,来一杯热茶,爆破在口里浓度刚刚好的卡士达甜馅,感觉是。。。和泡芙馅一样美好。


Ingredients:
water roux /Tangzhong:
30 g bread flour
150 ml water

Bread Dough:
300 g bread flour
100 g cake flour (top flour)
6 g instant dry yeast
1/2 tsp salt
30 g sugar
15 g milk powder
1 egg
90 ml water
150 g Tangzhong (water roux)
45 g butter, cut in small pieces
some flour for dusting the hands and dough


Pastry Cream Filling:

400 g fresh whole milk
1 tsp concentrate vanilla extract
5 egg yolks
80 g sugar
40 g pastry flour, sifted

Glazing:
1 tsp golden syrup + 3 tbsp milk, mix together


Method:
Prepare water roux: In a small pot, add all water roux ingredients cook and stir the mixture until thicken, remove and set aside for later use.


Prepare filling: 
1. In a saucepan, add milk and concentrate vanilla extract, bring to just boil. 
2. In a clean bowl, beat egg yolks and sugar together using a hand whisk. Mix until the mixture is pale yellow. Add flour and mix well.
3. Gradually add hot milk to the egg mixture, mix well.
4. Pour the egg-milk mixture back to the saucepan and bring to boil over high heat, keep stirring until the mixture becomes smooth and glossy, remove from heat.
5. Transfer half of the pastry cream into a container, cover with cling wrap and let it cool in freezer (but not frozen). For the other half, place it in a pipping bag and let it cool in freezer too. About half an hour, place both pastry cream in fridge for later use. For the pastry cream in the container, cut them into equal 12 pieces.


Prepare bread dough: In the KitchenAid mixing bowl, add bread flour, cake flour, instant dry yeast, salt, sugar, milk powder, egg, and water roux. Using low speed (speed 1), mix for a min, gradually add water. Switch the speed to 2, mix the ingredients until it comes together to form a rough dough. Add the butter pieces, let the Kitchen Aid knead the dough at speed 4 until the dough form elastic window pane. 

Place the dough in a lightly greased bowl, cover and proof until the dough double its size. Punch down the air in the dough and divide it into the portions you like, in my case 12 portions. Roll the dough into round balls, let it rest for 10 mins. 

Flatten the dough into circle shape, wrap in a piece of pastry cream filling, roll it up, seal the edge and seam site down on lined baking tray. Let it proof until double its size. Egg wash the bun dough. Pipe the pastry cream on the top of each bun in a circular motion, start from the centre top of the bun goes outward.

Bake in preheat oven at 180C for 15 mins or when the buns turned lightly brown. Let the buns cool on the wire rack.


11 July 2017

Pork Floss Buns 肉鬆面包 (65C Tangzhong Method)


Pork Floss Bun is one of my family's favourite. There are two ways of presenting this bun, one method is by slicing open the top of the bun, apply mayonnaise and place the pork floss on top of it. (like what I did here) Second method is place the pork floss inside the bun. I'm now doing the second method.

The biggest challenge of moving house for a baker is not just packing and unpacking the kitchen but facing the new oven. Every single record I made on the oven temperature and timing may become irrelevant. I'm using my previous recipe on pork floss buns with minor changes. This recipe produces very soft bread texture.

I ate two buns straight just after taking the photos ^^

This recipe yield 12 buns.


Ingredients:
Water Roux/Tangzhong:
25 g bread flour
125 ml water

Bread Dough:
250 g bread flour
90 g cake flour (top flour)
6 g instant dry yeast
1/2 tsp salt
30 g sugar
15 g milk powder
1 egg
80 ml water
100 g Tangzhong (water roux)
45 g butter, cut in small pieces
some flour for dusting the hands and dough

some black sesame seeds (optional)

Glazing:
1 tsp golden syrup + 3 tbsp milk, mix together


Filling:
Some pork floss (~40 g) 

Method:
Prepare water roux: In a small pot, add all water roux ingredients cook and stir the mixture until thicken, remove and set aside for later use.


Prepare bread dough: In the KitchenAid mixing bowl, add bread flour, cake flour, instant dry yeast, salt, sugar, milk powder, egg, and water roux. Using low speed (speed 1), mix for a min, gradually add water. Switch the speed to 2, mix the ingredients until it comes together to form a rough dough. Add the butter pieces, let the Kitchen Aid knead the dough at speed 4 until the dough form elastic window pane. 

Place the dough in a lightly greased bowl, cover and proof until the dough double its size. Punch down the air in the dough and divide it into the portions you like, in my case 12 portions. Roll the dough into round balls, let it rest for 10 mins. 

Flatten the dough into circle shape, wrap in a heap teaspoon of pork floss filling, roll it up, seal the edge and seam site down on lined baking tray. Sprinkle some black sesame seeds on the top of the bun. Let it proof until double its size. Egg wash the bun dough.

Bake in preheat oven at 180C for 13~15 mins. Let the buns cool on the wire rack.


06 July 2017

Tri-Flavoured Chiffon Cake 三味戚风蛋糕


Chiffon Cake, a light and airy cake which is popular among Asian. There are many different recipes and may be "rules" for baking a successful chiffon cake (which the cake sponge will not collapse or shrink a lot, once the cake is out from the oven). I used to adhere to my pandan chiffon cake recipe which I baked a lot recently for fundraiser.  

In this Tri-flavoured Chiffon Cake recipe, first rule is "you have to know your oven", yes, as simple as the rule yet very difficult for us baker to remember the fundamental baking rule. I placed an oven thermometer in my oven to monitor the actual temperature while baking the chiffon cake. 

In my recipe, I don't use cream-of tartar and baking powder. Beat the egg whites to the exact soft peak is very important. Combine the meringue into egg yolks mixture by using the correct folding technique is crucial for a successful chiffon cake. Yes, even I abide with the above rules I still encounter many times of unsuccessful bakes. We are human after all. ^^ There are many factors contributed to it, for instance, water in the mixing bowl, oily unclean cake pan., etc. 


(18cm chiffon cake pan)
Ingredients for egg yolk mixture:
4 egg yolks
20 g sugar
50 ml olive oil
50 ml thick coconut milk
90 g cake flour
1/2 tsp vanilla extract
1/2 tsp strawberry essence
a drop of pink food colouring
1/2 tsp coffee emulco 
a drop of brown food colouring
a drop of pandan paste

Ingredients for meringue:
5 egg whites
50 g sugar
a pinch of salt

Method:
1. In a bowl, hand whisk egg yolks and sugar until the sugar dissolves and the egg yolks is light and pale. 
2. Add vanilla extract, olive oil and coconut milk. Mix well.
3. Sift in the cake flour in three batches, mix well.
4. Divide the batter into three equal portions with a spoon (I didn't weight my cake batter)
5. Add strawberry essence and a drop of pink food colouring to one portion of batter. Mix well.
6. In another portion of batter, add coffee emulco and a drop of brown food colouring. Mix well.
7. For the remaining batter, add a drop of pandan paste. Mix well.
8. In a clean KitchenAid mixing bowl, add egg whites and a pinch of salt. Mix with speed 4 for a while until bubbles form. Turn the mixing speed to 10, add in sugar in three batches. Beat the egg whites until soft peak stage. 
9. Scoop two heap tablespoons of meringue into each batter respectively. Stir well each batter to break down the mixture. Then divide the remaining meringue into three equal portions, gently fold in the meringue into each egg yolks batter.
10. Pour the batters into a chiffon pan layer by layer. Use a spatula to even out the surface of each layer. Gently tap the cake pan against the tabletop to remove trapped air bubbles.
11. Bake in preheated oven at 140~150C for 55 mins. or toothpick come out clean.
12. Once baked, remove the cake pan from oven, invert the cake pan to let it cool down completely. 
13. Dislodge the cake only when it is cool. 


05 July 2017

Milk Bread Curry Buns 柔软咖哩面包 (65C Tangzhong Method)


I have some leftover chicken and potatoes curry filling from making Spiral Curry Puffs, this week I'm into bread baking. In fact, I have made three batches of Milk Bread Curry Buns! Some of the curry buns were given away as a present to my son's piano teacher.

When I was searching for curry buns on the Internet, I saw the lovely curry buns created by Nasi Lemak Lovers, she wrapped her curry buns with Pandan Leaves. I think this is a good way of presenting the curry buns in South East Asia style, the pandan and curry leaves give a lovely fragrance and it does make this curry buns standout a lot. I'm using the bread recipe from my Pork Floss Buns, this recipe produces a soft milky bun texture which I think is best to go with the warm chicken potatoes curry filling. 

If you didn't finish consume the buns within the same day of baking, you may place it in fridge, heat up 20 seconds in a microwave will warm up the curry filling. 

This recipe yield 10 pieces of buns.


Ingredients:
Water Roux/Tangzhong:
25 g bread flour
125 ml water

Bread Dough:
200 g bread flour
90 g cake flour (top flour)
6 g instant dry yeast
1/2 tsp salt
30 g sugar
15 g milk powder
1 egg
65 ~100 ml water (the bread dough form has to be soft and moist to touch, if not gradually add more water)
120 g Tangzhong (water roux)
45 g butter, cut in small pieces
some flour for dusting the hands and dough

Filling:

150 g chicken and potatoes curry filling

Extra (Optional):
some pandan leaves
some curry leaves

Egg wash:
1 tbsp golden syrup + 1 egg, mix together

Method:

Prepare water roux: In a small pot, add all water roux ingredients, cook and stir the mixture until thicken, remove and set aside to cool for later use.


Prepare bread dough: In the KitchenAid mixing bowl, add bread flour, cake flour, instant dry yeast, salt, sugar, milk powder, egg, and water roux. Using low speed (speed 1), mix for a min, gradually add water. Switch the speed to 2, mix the ingredients until it comes together to form a rough dough. Add the butter pieces, let the Kitchen Aid knead the dough at speed 4 until the dough form elastic window pane. 

Place the dough in a lightly greased bowl, cover and proof until the dough double its size. Punch down the air in the dough and divide it into the portions you like, in my case 10 portions. Roll the dough into round balls, let it rest for 10 mins. 

Flatten the dough into circle, wrap in a heap teaspoon of curry filling, seal the edge and seam site down on lined baking tray. Wrap the dough loosely with a pandan leaves, place a piece of curry leaves on top of the dough. Let it proof second time, until double its size. Egg wash the bun dough.

Bake in preheat oven at 180C for 5 mins then switch the oven temperature to 150C and bake for 10 mins. Let the buns cool on the wire rack. (Oven temperature and timing may vary depends on the capacity of your oven)